Kits Secret Guitar, Gear, and Music Page
Guitar stuff, gear stuff, soundclips, videos, Gilmour/Pink Floyd stuff, photos and other goodies.
Copyright Kit Rae.
VISIT MY SWORDS, KNIVES and FANTASY ART WEBSITE www.kitrae.net
CUSTOM PEDALBOARD PROJECT
Blog article written in 2018
June 1, 2019 - I have built several pedalboards for myself over the years, usually some type of simple wood shelf system with pedals velcroed on top. They suited my needs but were always a bit messy and a headache to switch pedals out. I had been using the same board for around 10 years and it was literally falling apart, so I pulled all the pedals off and sat them on some wood slats temporarily until I could buy a modern board to mount them on. I figured that if I was going to make another board that this time it was going to have nearly everything I used regularly on it, have tons of loops, and be something that would last me another 20 year or so. After looking at all the different pre-made pedalboards out there - Pedaltrain, Freidman, Behringer, Temple Audio, Voodoo Lab, MONO, et cetera - I could not make a decision. That went on for a year, and all I really accomplished was picking a programmable looper for the board. I found I was playing less guitar because I just did not want to deal with the mess, so it was time to get in gear and figure out what to do.
The problem was that none of the pre-made pedalboard systems really seemed to suit my needs or size requirements. What I liked better were some of the custom made pedalboards I had seen from West Coast Pedaboard, Blackbird, Maple Rock, Pumaboards, Pedal Pad, Trailer Trash, Woodross, and others. I had been building my own boards since the late 1980s, so I thought I would just do it myself again. This time I would incorporate modern things I never had before, like built in input and send/return jacks, a master power supply with one switch, hinged shelves, and multiple loop switchers. I already had all the wood making gear I needed - like a table saw, skill saw, and a router - so I did not think there was anything particularly difficult that I could not do.

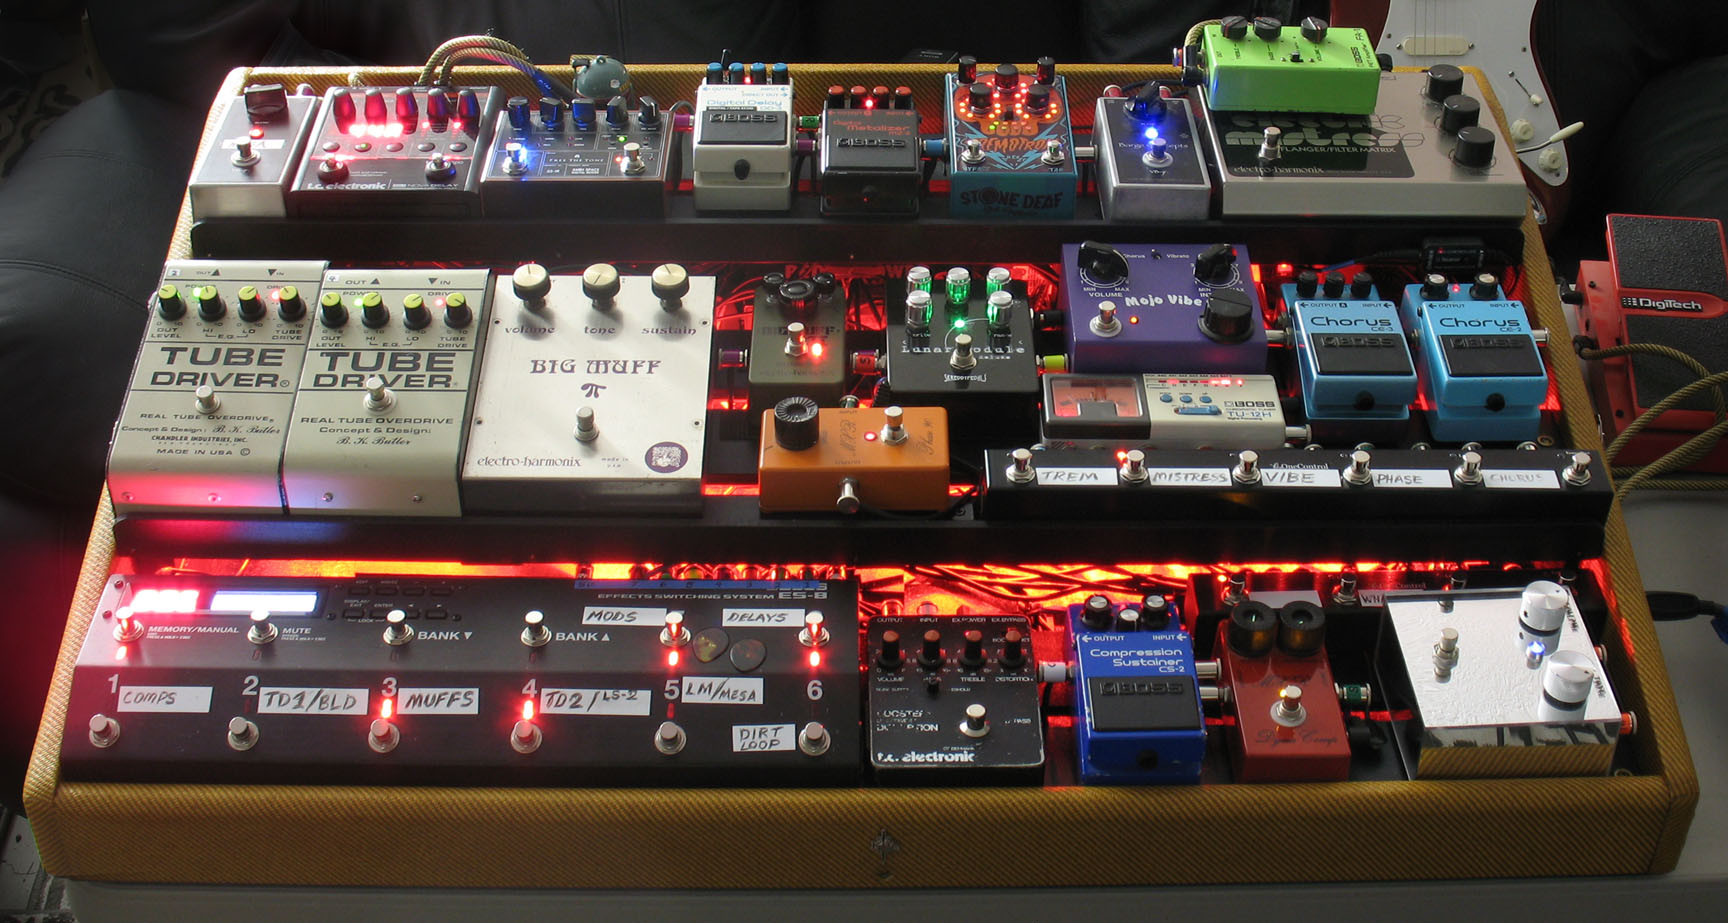
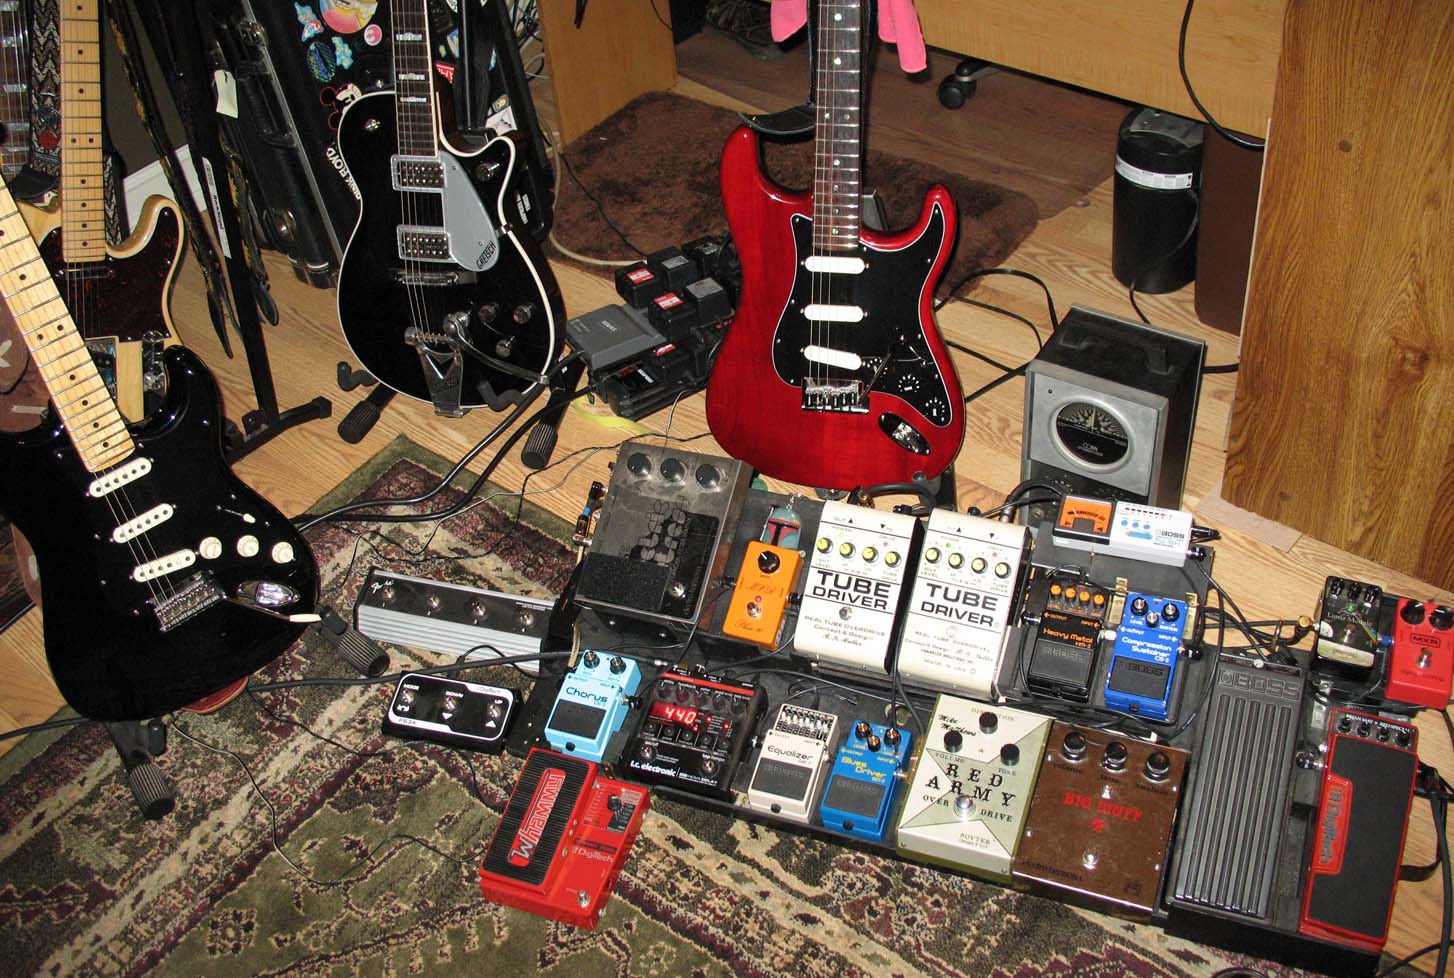
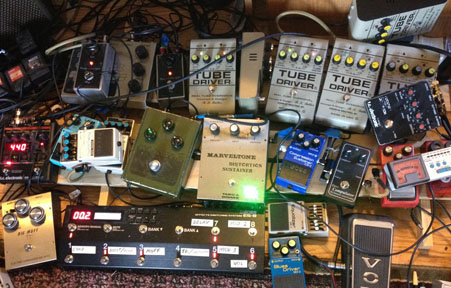
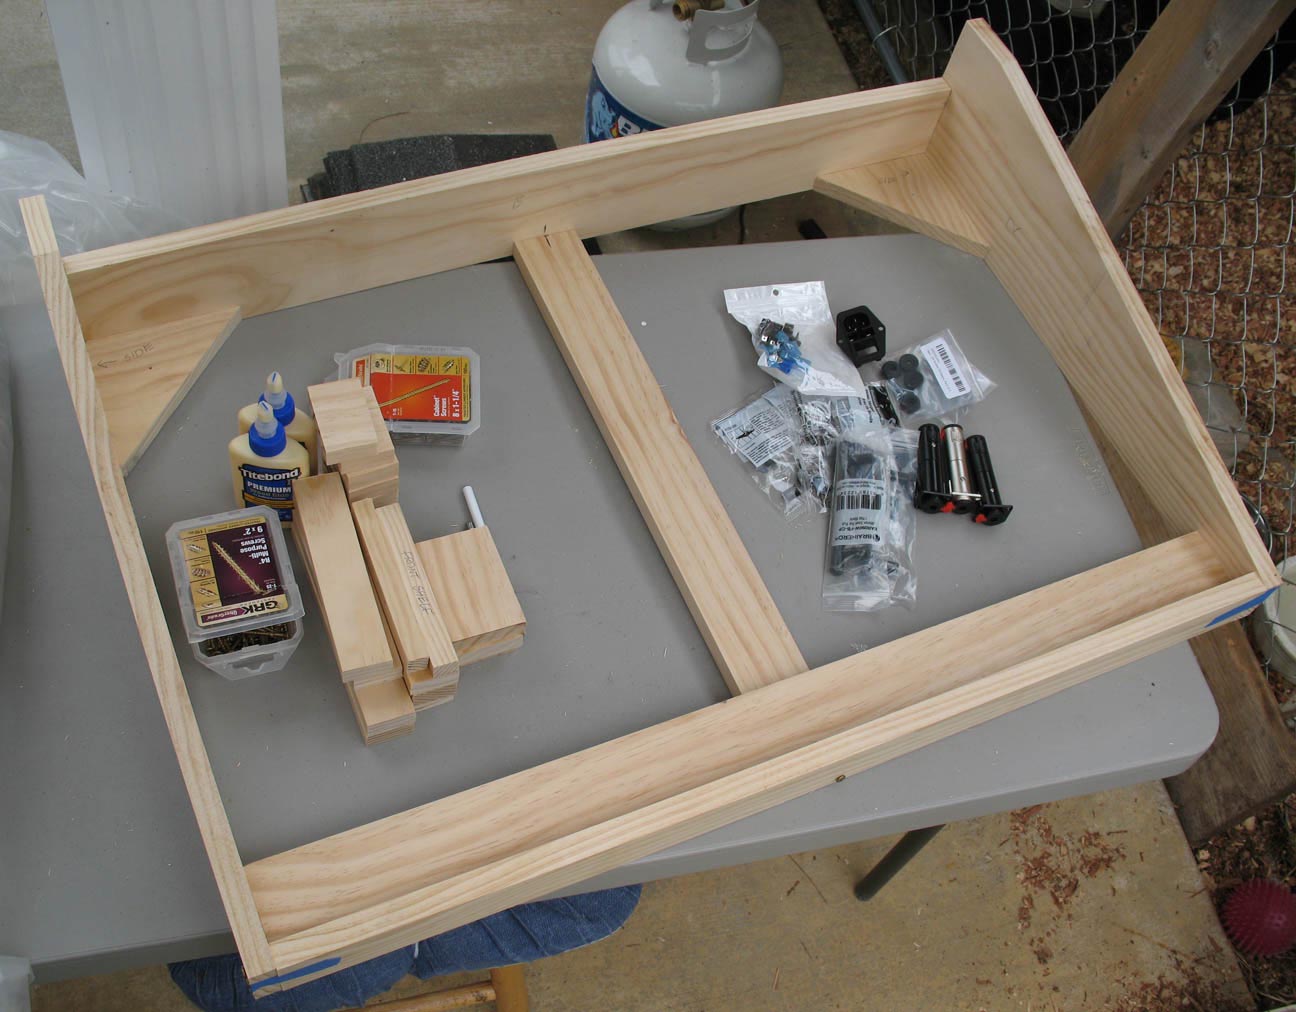
shown above - my old, retired pedalboard on the left and the state of my current pedal pile on the right
I used to have a band with some friends back in the 1990s and I transported my pedalboard and gear constantly. I mostly play and record in my small home studio these days, so I decided not to worry about the size or transporting the new pedalboard. This was just going to be a studio board. It would be as large as needed, but the pedals would still be secured and it would have carrying handles, just in case I wanted to move it. Since I mostly play David Gilmour/Pink Floyd music and my own material, I already knew what effects were going to be on it for those tones, but I also wanted to add a programmable switching system with at least 8 loops and a few extra loop switchers. I also wanted a few places to easily swap out pedals if needed, as I am always trading pedals out and trying new things.
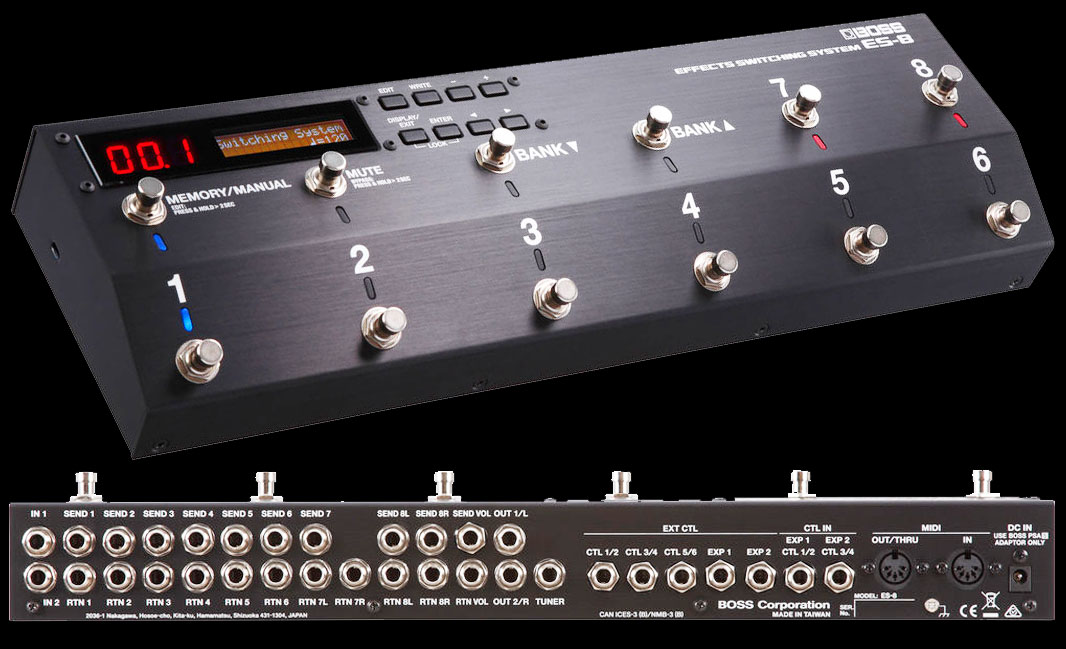
After comparing all the programmable switchers on the market I decided the Boss ES-8 Switching System was the one to go with. It has 8 separate loops, stereo outputs, and simple patch programming. I bought one and tested it out for several months before I started the pedalboard design. Rather than having a massive number of loops in one giant switcher, I decided this would be a loop-within-loop setup, something I have had an idea to try for several years. The board would include a separate 5-loop switcher for my modulation pedals, and a 3-loop switcher for additional dirt pedals, each connected to dedicated loops in the Boss ES-8. I tried a couple of loop switchers and decided on the OneControl brand, specifically the Iguana Tail and Xenagama Tail.
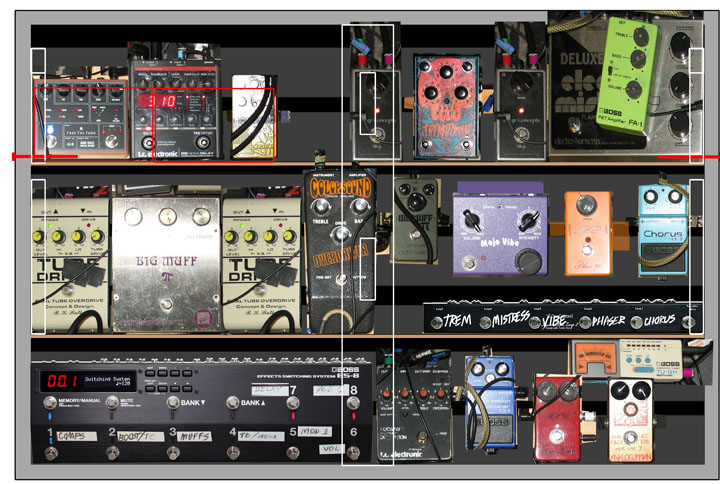
shown above - rough Photoshop layout of my new pedalboard
I made a rough Photoshop layout of all the pedals I wanted to include to get the exact pedalboard size, including the ES-8. The estimated size would be 24" wide x 36" deep x 7 1/8" tall. I then made a wish list of all the other things this pedal board must have:
• built in power supply with one external power cord and a master on/off switch
• LED lighting to see the pedals in the dark
• three send/return jacks for my volume pedal and external effects
• stereo output jacks to connect two amplifiers
• all jacks for all external cables must be the locking type, so they cannot accidentally be pulled out
• interior LED lghting to easily see the patch cables and power cables under the shelves
• hinged wood shelves with a pedal securing system
• carrying handlesNext was writing up the proposed signal signal chain order and identifying where the buffered pedals would be placed, and which ES-8 loops the smaller loop switchers would be placed in:
Signal Chain - in chain order
Analogman Sunface (off board) > Wah (off board) >
input to board >
Boss ES-8 Effects Switching System > Tuner Out - Boss TU-12H
--Loop 1 - MXR Dynacomp Script (mechanical bypass) > Boss CS-2 compressor (buffered bypass)
--Loop 2 - Dirt Loop Switcher (Xenagama Tail - no buffer)
-----XT Loop 1 - Super 72 >
-----XT Loop 2 - to external S/R jacks > WH1 Whammy (buffered) >
-----XT Loop 3 - Boss MZ-2 (buffered bypass)
--Loop 3 - BKB/Chandler Tube Driver - LOW GAIN (input buffer only) > TC Booster +Line Driver (buffered bypass)
--Loop 4 - Green Russian Big Muff > '73 Big Muff
--Loop 5 - BKB Tube Driver - HIGH GAIN (input buffer only) > Lunar Module (mechanical bypass, no buffer) > Barge Volume Blend Loop Switcher – to external S/R jacks
-----------> Mesa Boogie Studio Preamp (buffered)
--Loop 6 – Catalinbread Echorec
--Loop 7 - Modulation Loop Switcher (Iguana Tail - no buffer)
-----IT Loop 1 - Boss CE-2 chorus (buffered bypass) > Boss CE-3 chorus (buffered bypass) > IT Loop 2 - MXR Phase 90 (mechanical bypass) >
-----IT Loop 3 - Mojo Vibe (mechanical bypass, buffered when on) >
-----IT Loop 4 - Boss FA-1 for volume/EQ adjustment (buffered) > Barge Volume Blend Loop switch > Deluxe Electric Mistress (input buffer) >
-----IT Loop 5 - Tremotron (mechanical bypass, no buffer)
--Loop 8 - Volume Pedal (to eternal send/return jacks) > FTT Ambi Space - stereo reverb (buffered) > TC Nova delay - stereo (buffered) >
-----R Nova Output Jack to external 1/4" send jack > Reeves Custom 50 (Hiwatt)
-----L Nova Output Jack to external 1/4" send jack > A/B switcher > A = 59 Fender Bassman. B = Yamaha RA-200--Built In Power - Voodoo Labs PP2 #1. Voodoo Labs PP2 #2.
------------------------Boss PSA AC adapter.
------------------------EHX AC Adaptor for Electric Mistress.
------------------------Boss ES-8 AC adapter.
------------------------FTT AC adapter.
------------------------LED light strip AC adapter
------------------------all of the above plug into - Weltron 6 Outlet Surge Protecter with EMI/ RFI noise rejection - 1875w/15a
------------------------Urbest Male 10A 250V Inlet Module Plug with 5A Fuse Master SwitchJune 5th, 2018 - I then decided on how I wanted to build it. I tend to miss details until halfway into constructing projects, so this time I drew it all out in CAD, including every single piece so I knew exactly what I had to build and exactly what parts I would need to buy. I made sure each shelf was deep and wide enough to fit the all pedals selected, and that the height clearance between each shelf was enough for the pedals with rear mounted jacks to fit under, including the ES-8. I wanted a hinged center shelf for easy access to the two Voodoo Lab power supplies that will be inside, so I had an idea how to do that with some off-the-shelf metal hinges. The two raised shelves will each have gaps in the middle to run the cables and power supplies underneath. I may make both raised shelves hinged. I also decided to have the back wall split with the upper portion hinged, as I think I will need more access to the power supply area. The underside will be sealed, rather than open as on most modern pedalboards. For the outside case frame finish I decided a tweed covering with rounded corners would be interesting, like an old Fender tweed combo amplifier.
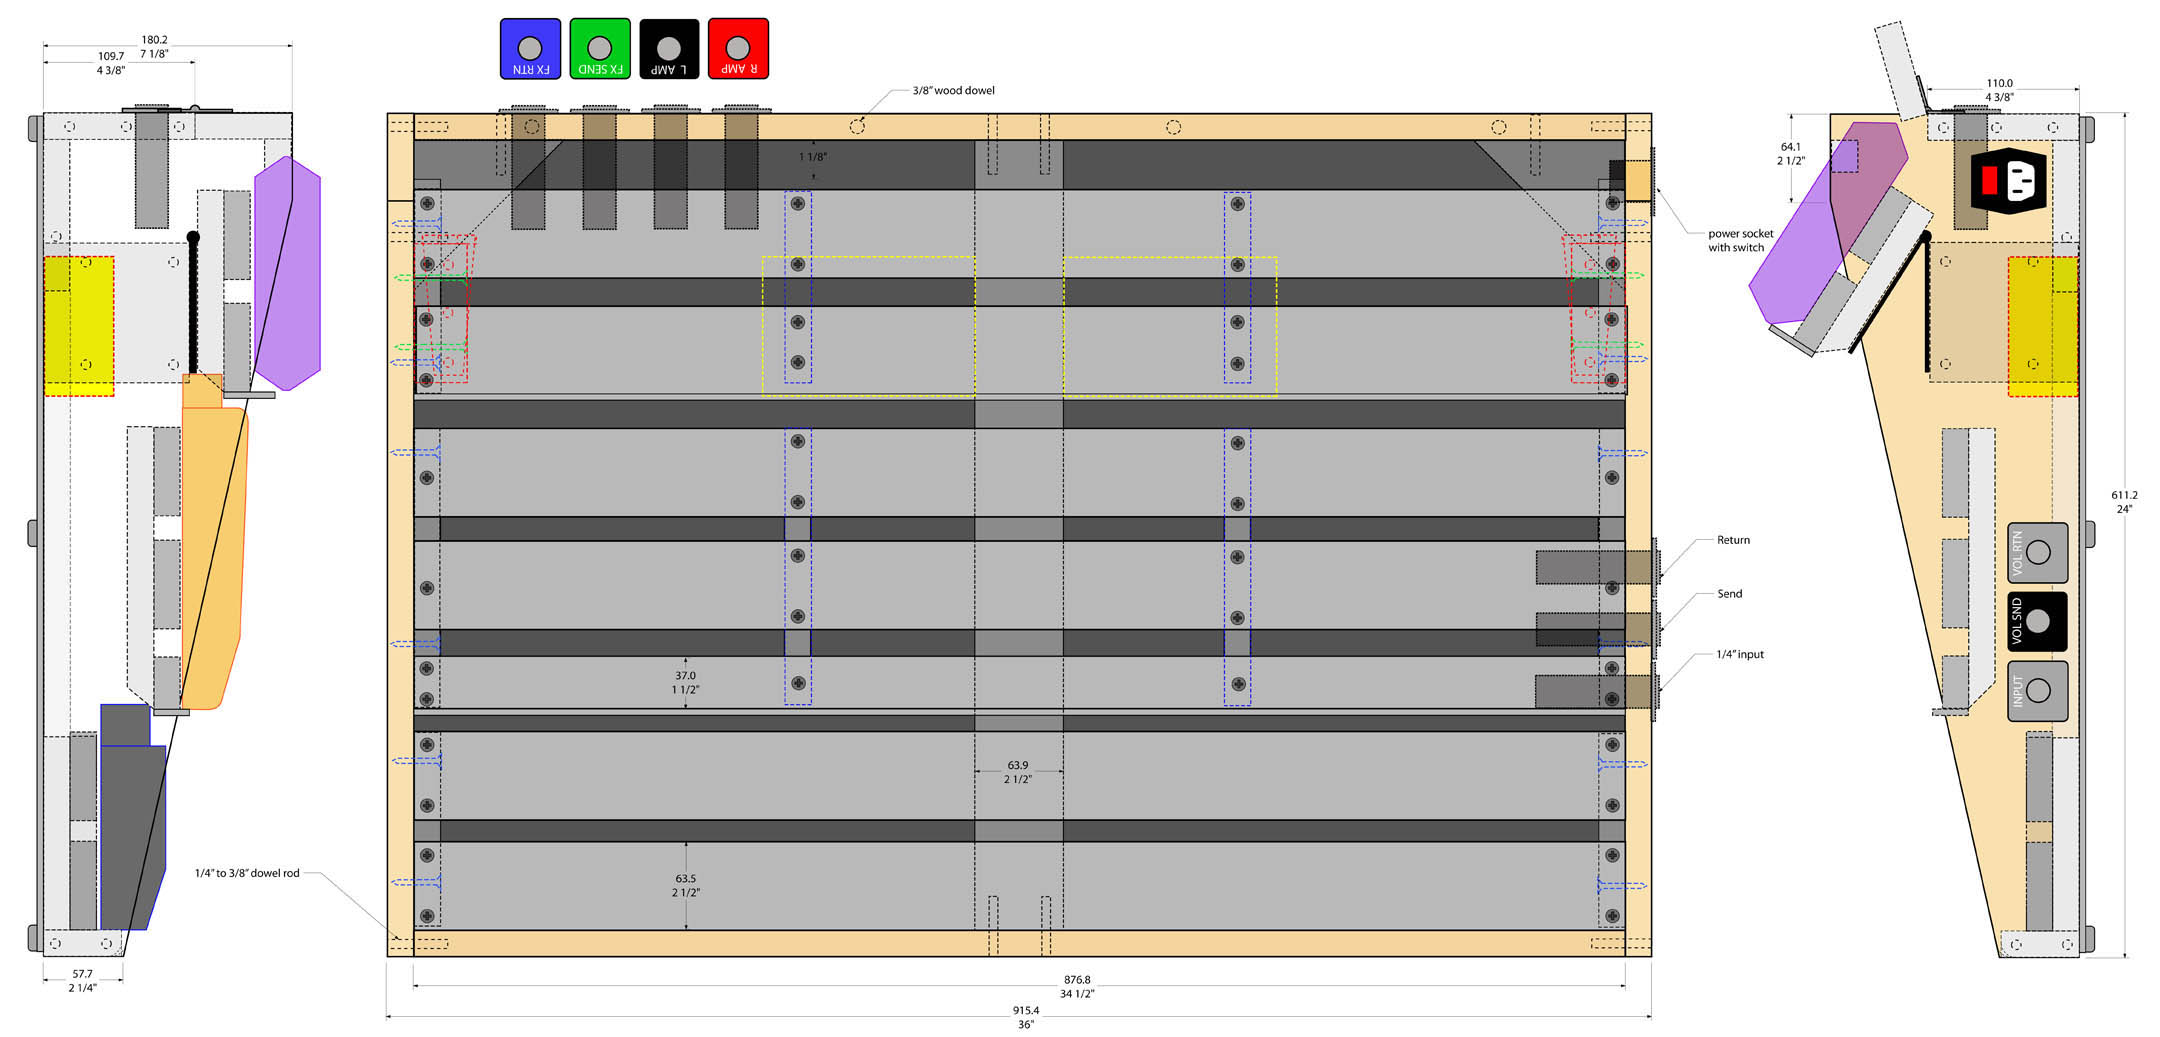
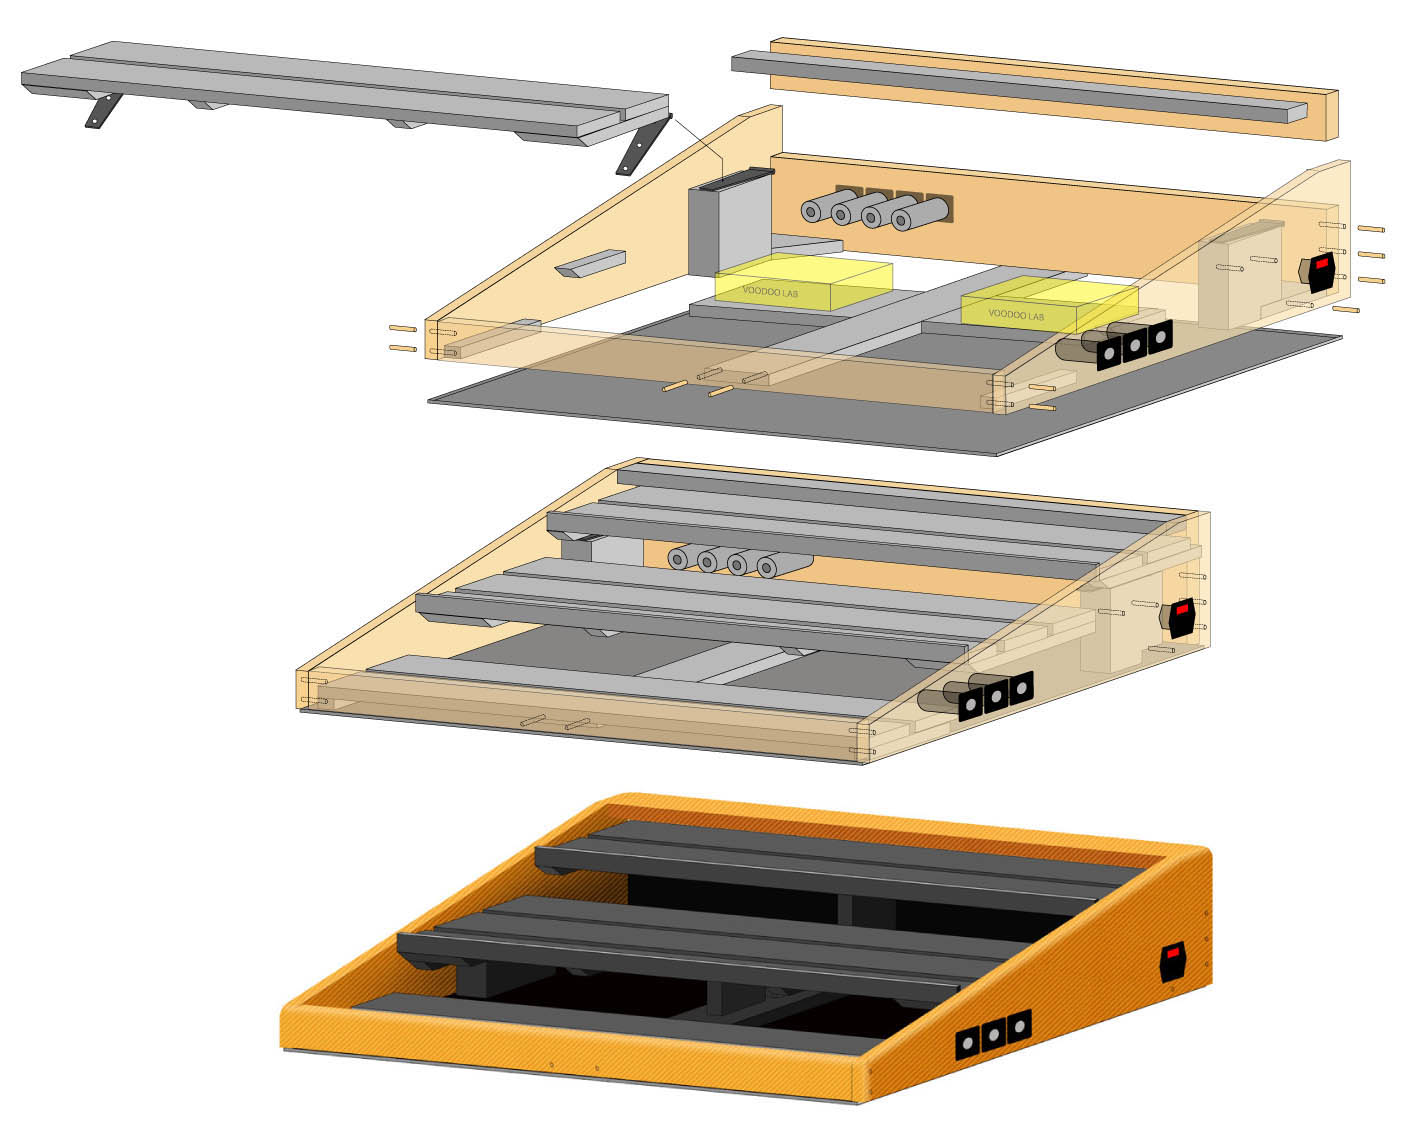
I estimated the empty pedalboard weight to be a bout 10lbs/4.5 kilos. With pedals...maybe 18kilos/40lbs, which will probably be too heavy to lift for one person considering the width of the board. I then made a list of the various pieces of wood I needed and purchased it all from my local Lowes hardware store. I'm using lightweight pine wood. 3/4" thick for the cabinet sides, braces, and shelves, along with a 1/8 " base board. I then measured and began cutting all the pieces on my table saw.


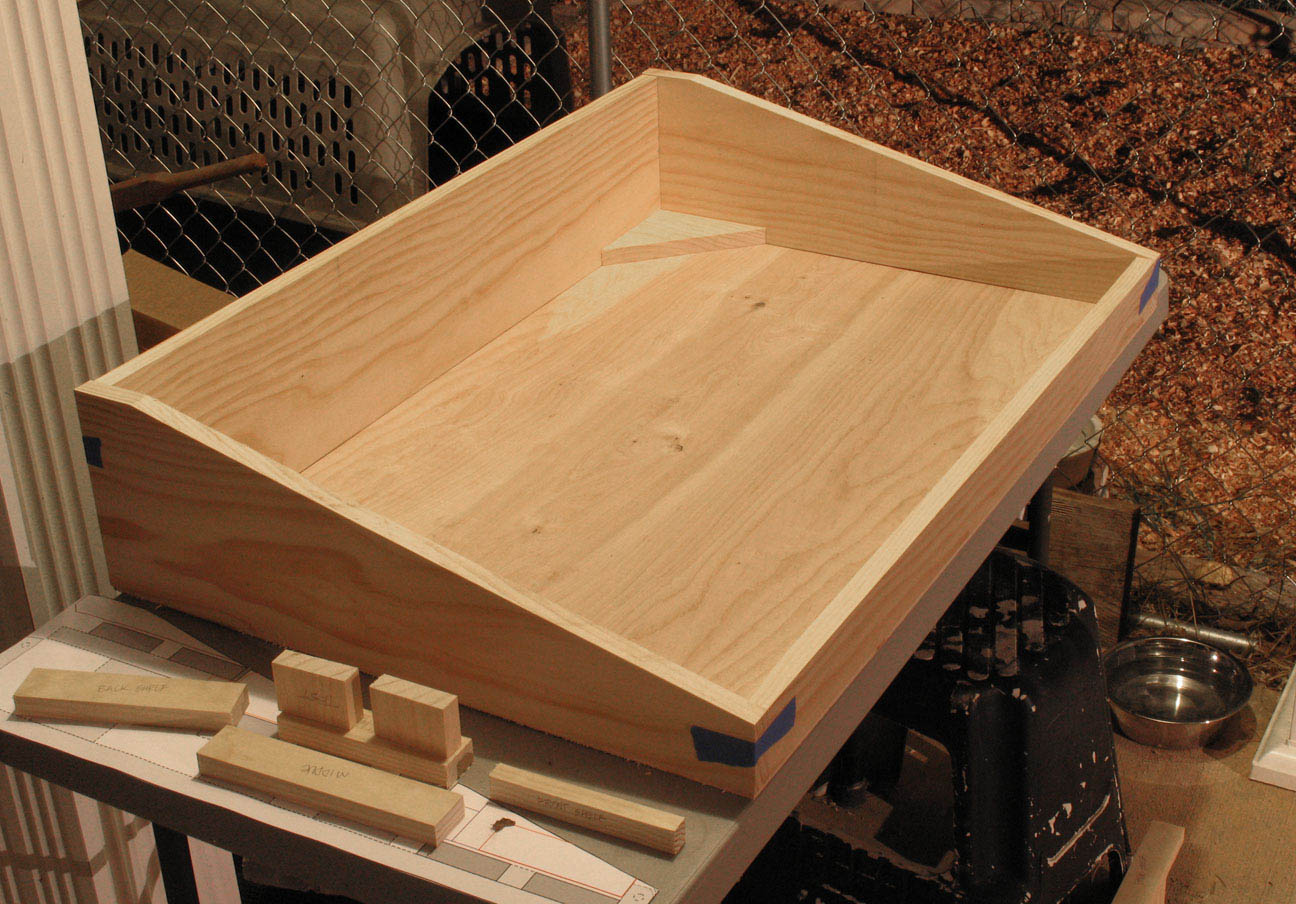
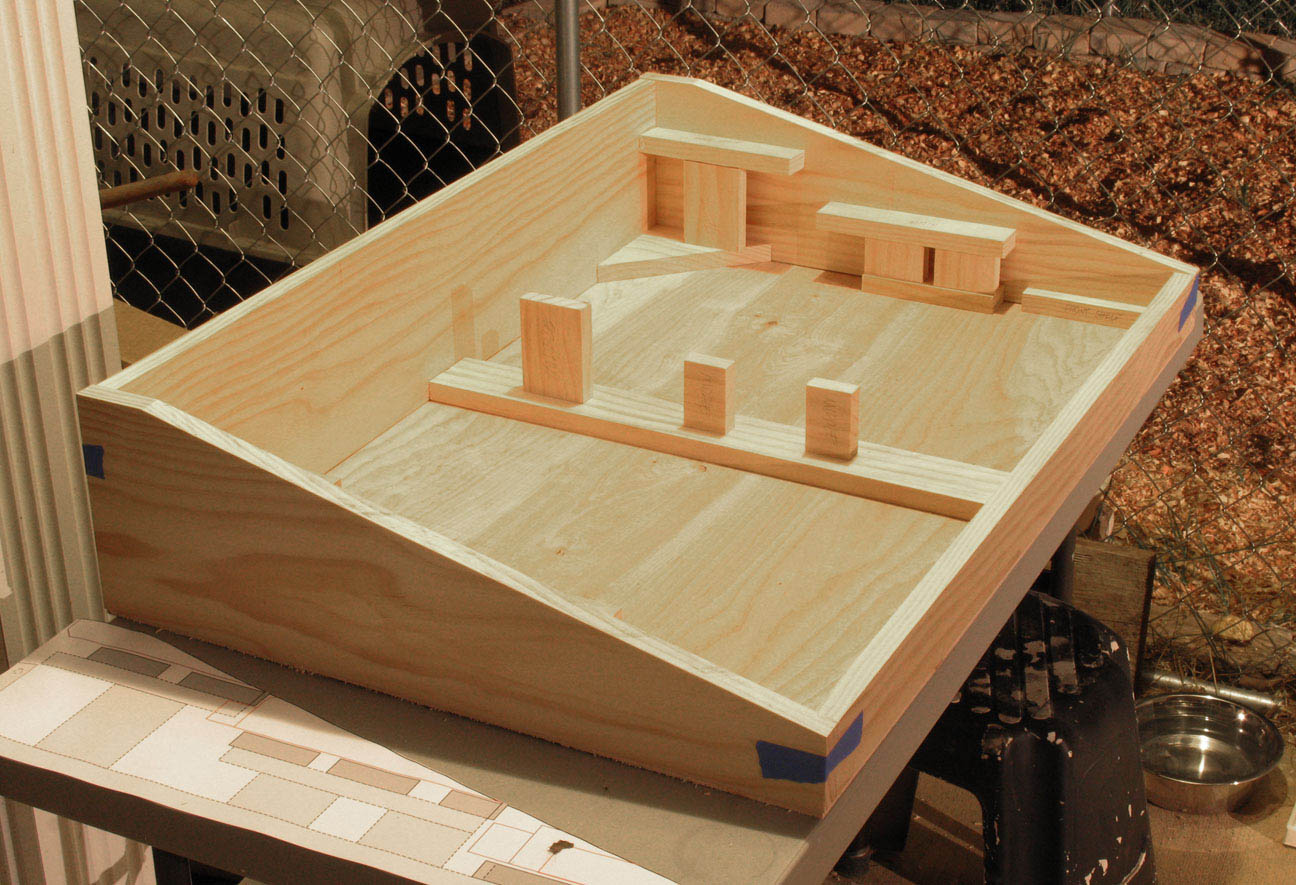
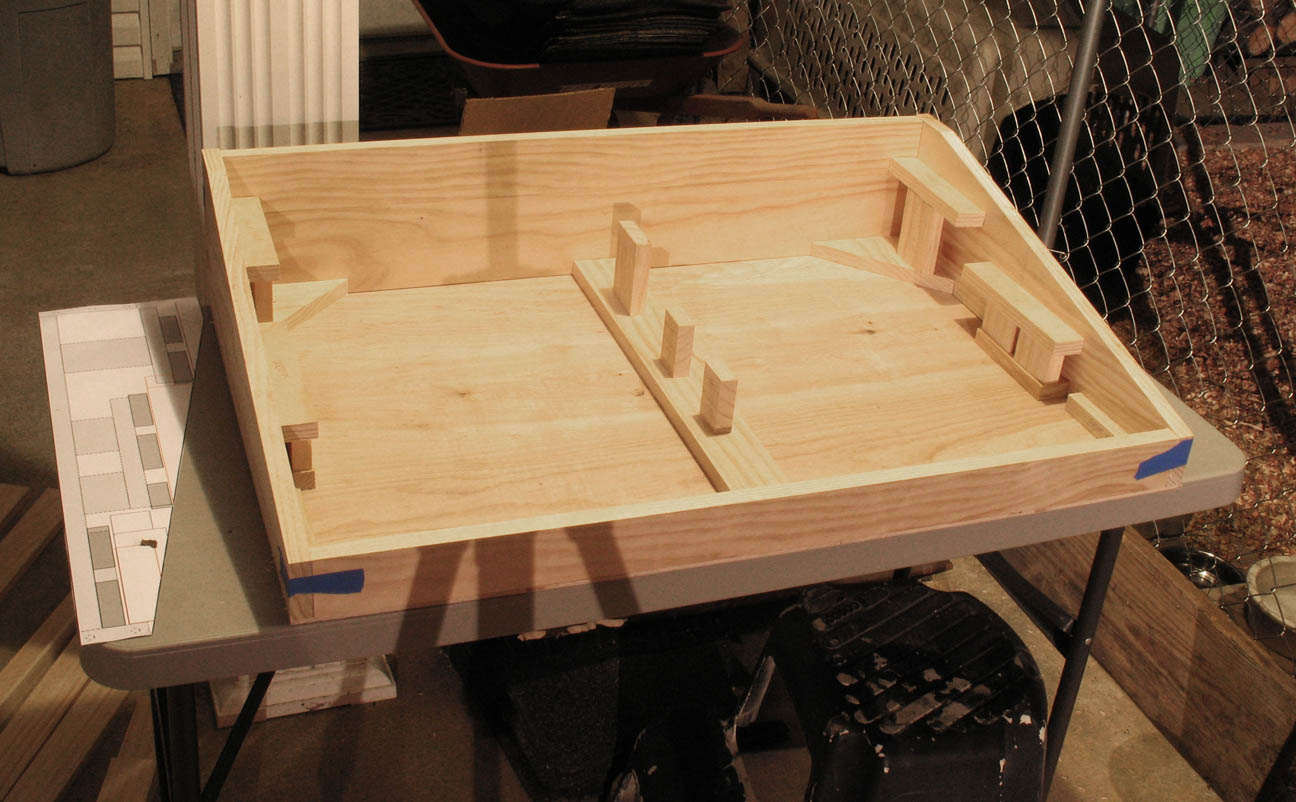
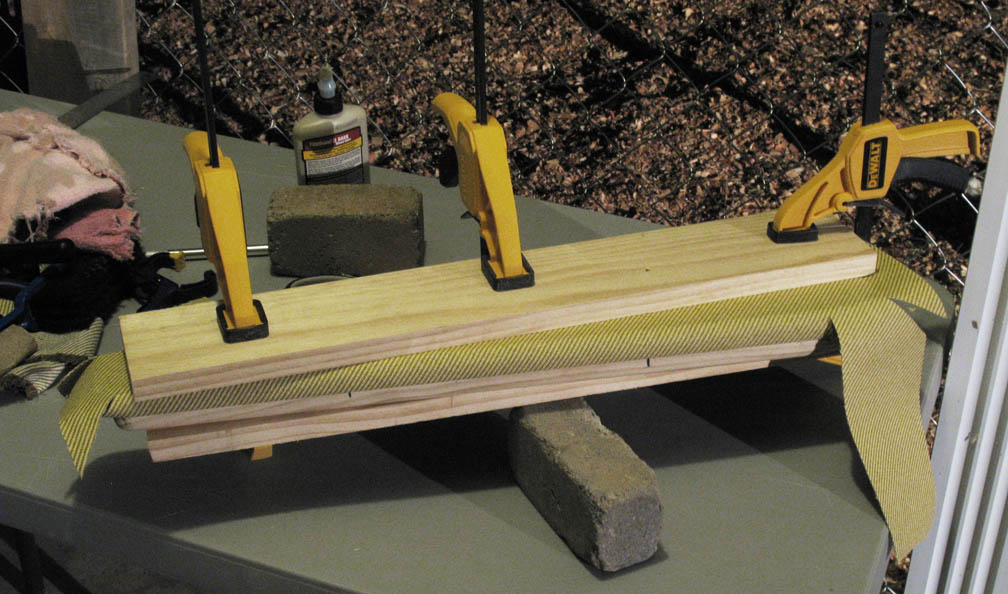
shown above - The cabinet frame is taped together. I made some temporary supports to check the shelf bracket height fit, to be sure I have enough clearance for everything
shown above - Cabinet frame is still taped together. Test fitting the clearance of wood shelves and checking how the corner supports and center brace fit.


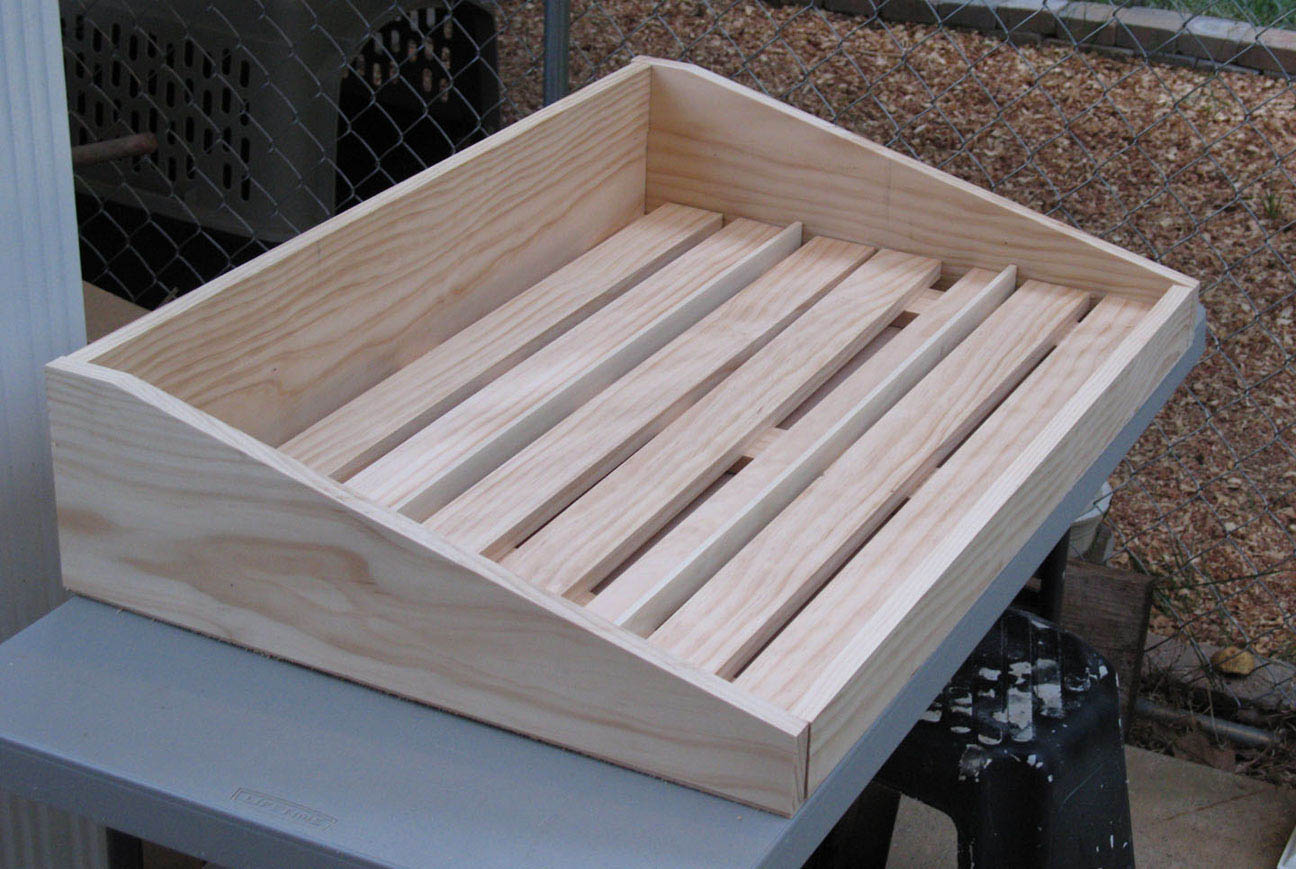
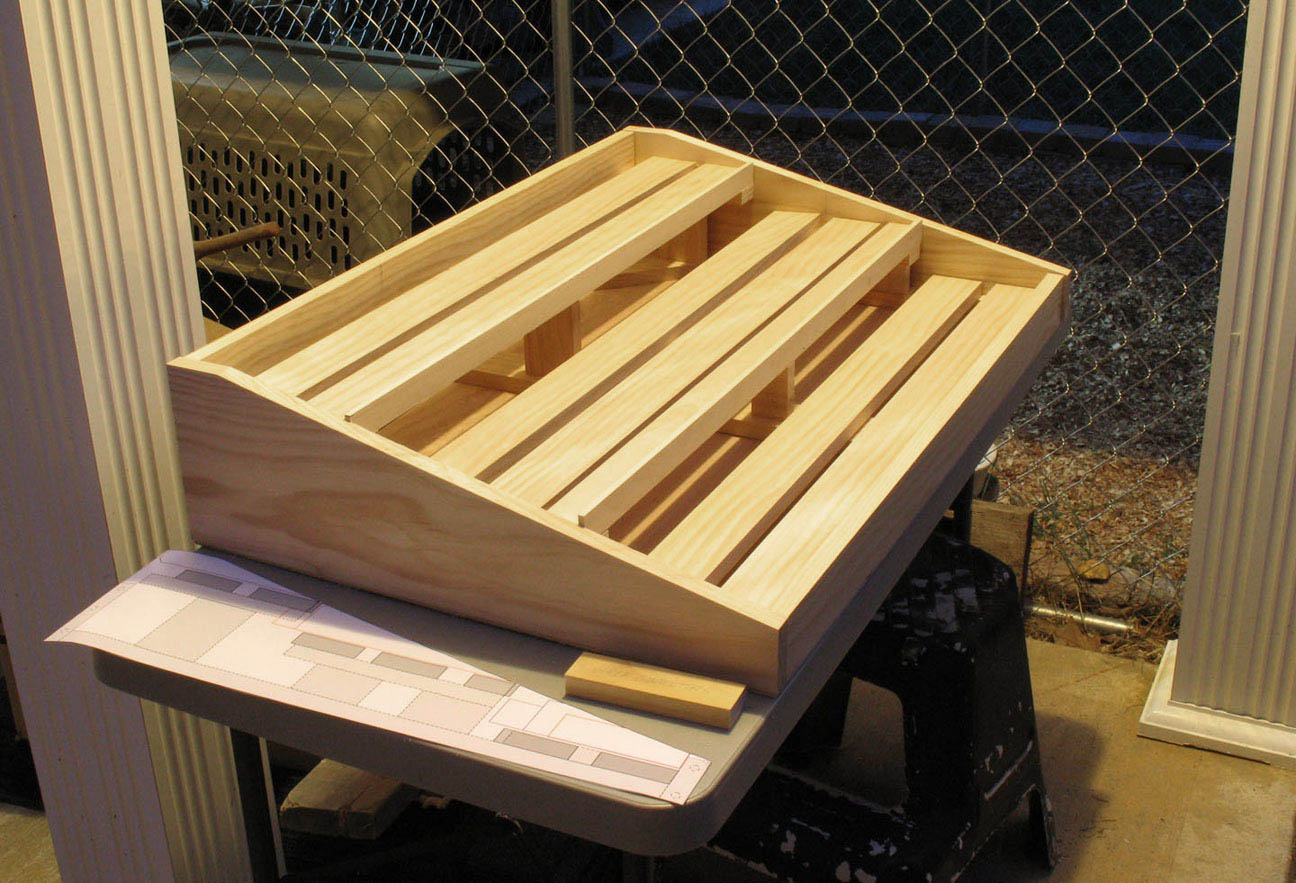
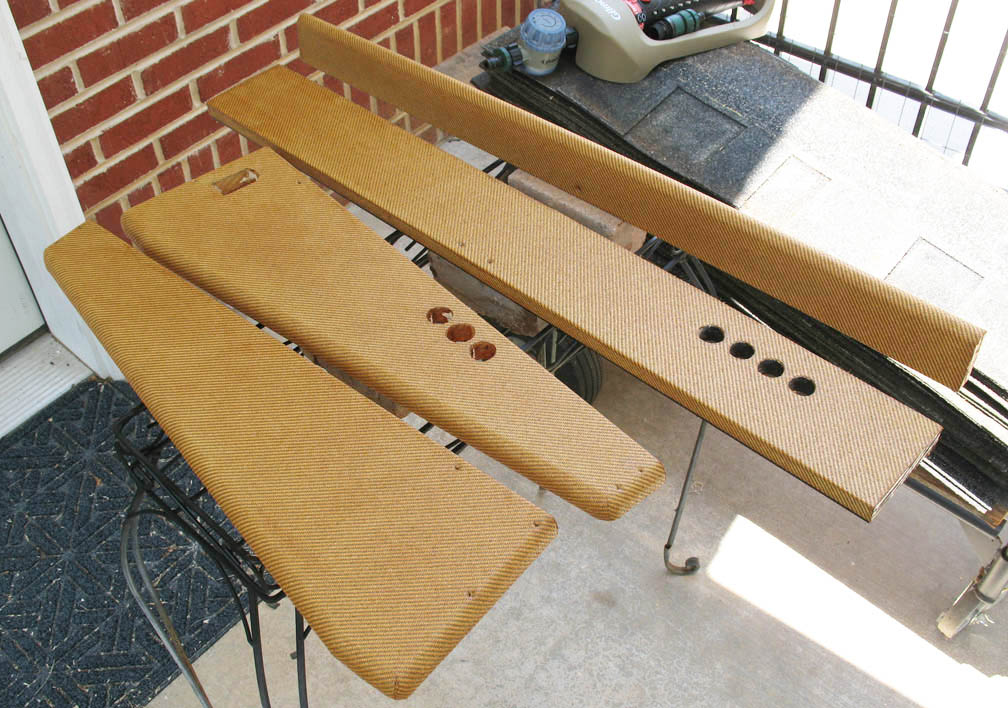
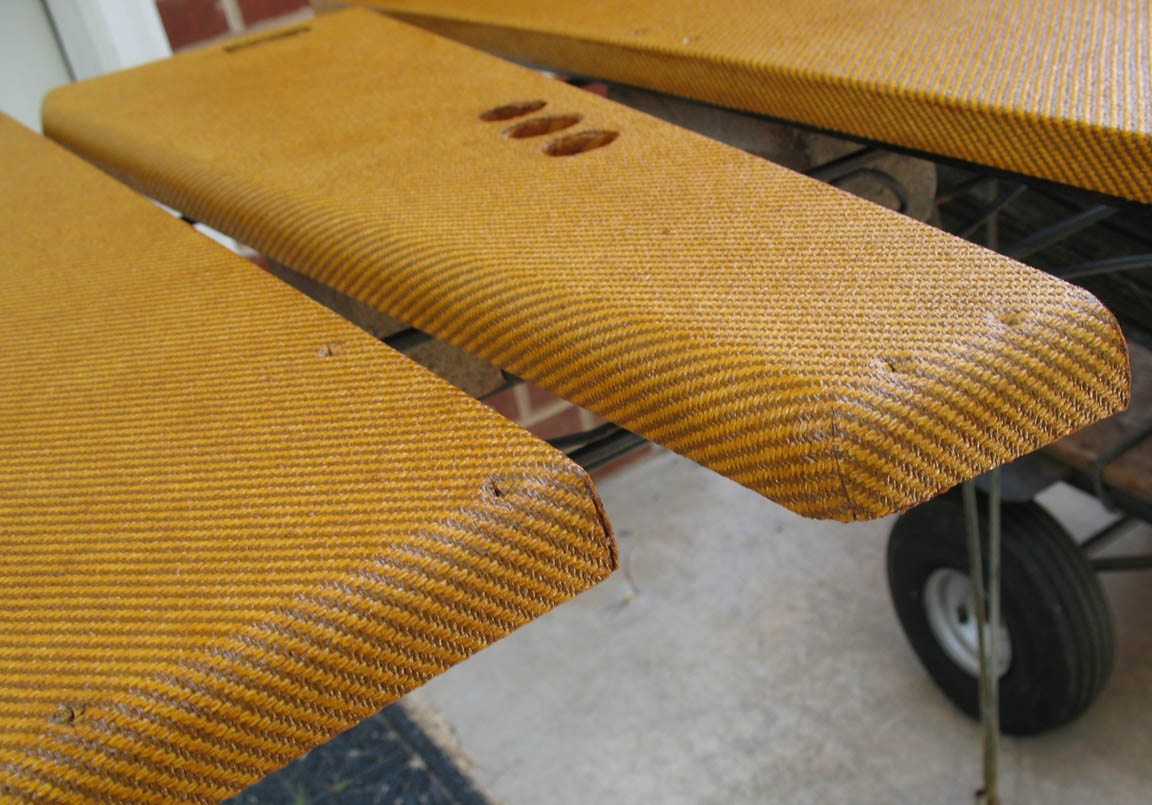
shown above - I added a 90 degree bevel to the underside of all the shelf slats so the patch cable ends would slip through easily.
I also rounded the outer cabinet corners with a router and test fit the 1/8" thick bottom cover.
June 5th, 2018 - I had a cheap Ryobi plunge router to do the rolled edge but no 3/4" roundover bit, so I bought one from Lowes. $29. It has been a while since I had done rounded corners, so I practiced on a some scrap. It's good that I'm covering this up in tweed, because I let the router slip and took a chunk out of one corner. I will have to fill that with some bondo or wood filler and sand it smooth.
This is primarily a studio board, which is why I am not worried about the size and weight, but I want it to be rock solid whenever I do need to move it. There are triangular corner braces at the rear. The fixed front shelf is the corner brace for the front, and there is also a center support connecting the front wall to the rear. The 3/16" thick bottom sheet will also be screwed to the frame, so structurally it should be very sound. I was going to use dowel rods and wood glue to secure the butt joint corners, but since I am going to wrap the outer walls in tweed, I decided to use 2" wood screws instead. I need to find some handles to bolt on that can support the weight. I think I am going to try for some leather covered handles like on my old Gibson guitar cases. That should look good with the tweed.
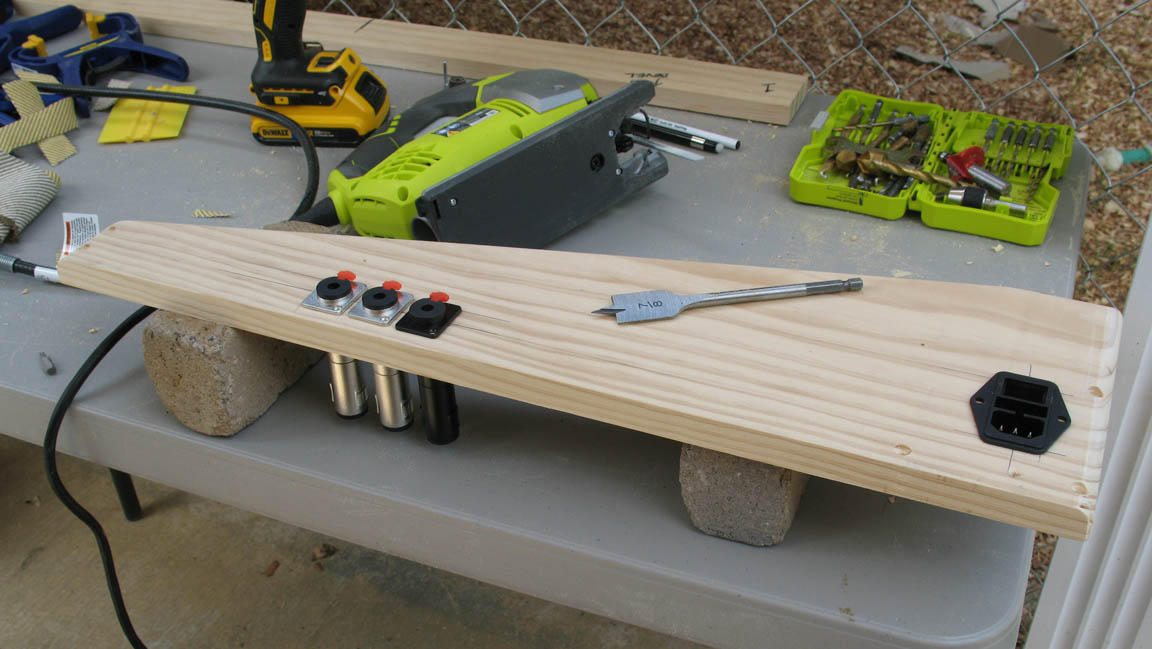
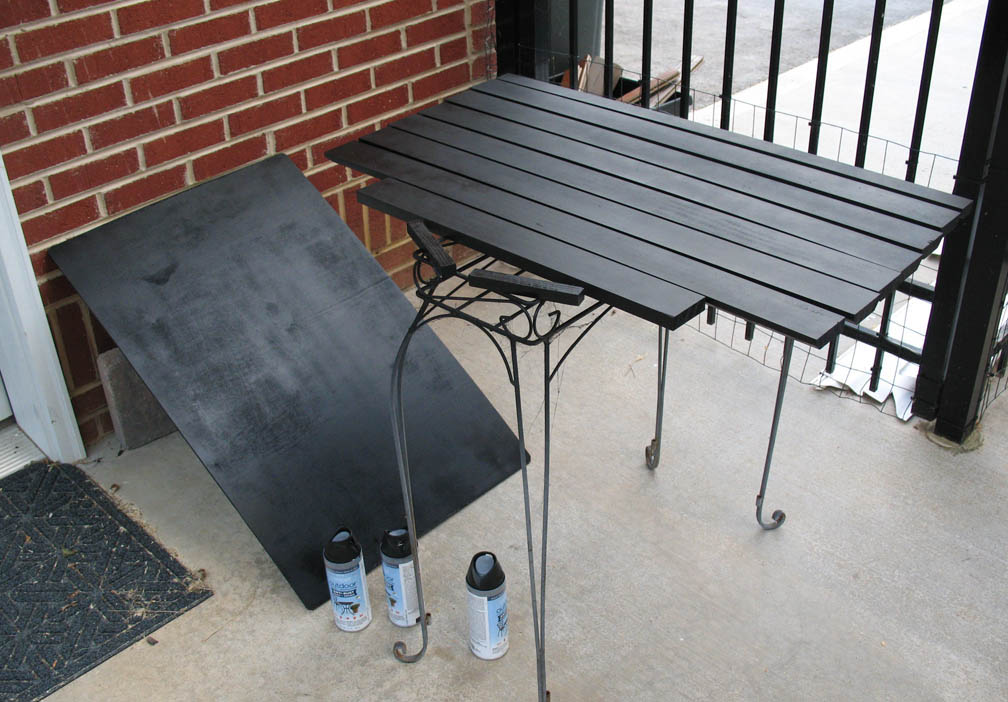
shown above - (left) jack holes adrilled and test fit, all screw holes drilled and counter sunk. (right) Shelves and base board painted black.
June 17th, 2018 - Next I pre-drilled all the screw holes and counter sunk them about 3/16" with a countersink bit, drilled all the jack holes, cut a power cord/switch hole with a skill saw, and test fit everything. I also spray coated all of the shelves and base board with about four coats of semi-gloss black paint. I ordered 1 yard of 64" wide Fender Style Tweed Olive Stripe Coated fabric from Mojotone, which cost around $34. I was already familiar with the quality of their tweed and the fact that one side comes pre-coated in a yellow-tinted sealant. That coating and the thickness mean the glue will not come through the front side after it is pressed flat.
June 15th, 2018 - I had never actually done a tweed wrap myself, so I watched a few youtubes on the subject. On my first try, let's just say I learned everything NOT do when gluing and wrapping tweed. I had to completely start over after the first attempt. I found the best way to do it is to coat the wood with wood glue (Titebond II Premium Wood Glue), spread it around evenly with a piece of flat plastic or a drywall putty knife, press the tweed on, roll it flat with a rubber roller, then clamp wood to booth sides to squeeze it flat while it dries. The glue dried sufficiently in just a few hours, so I had all the flat sides wrapped in one afternoon. Then came corner wrapping.


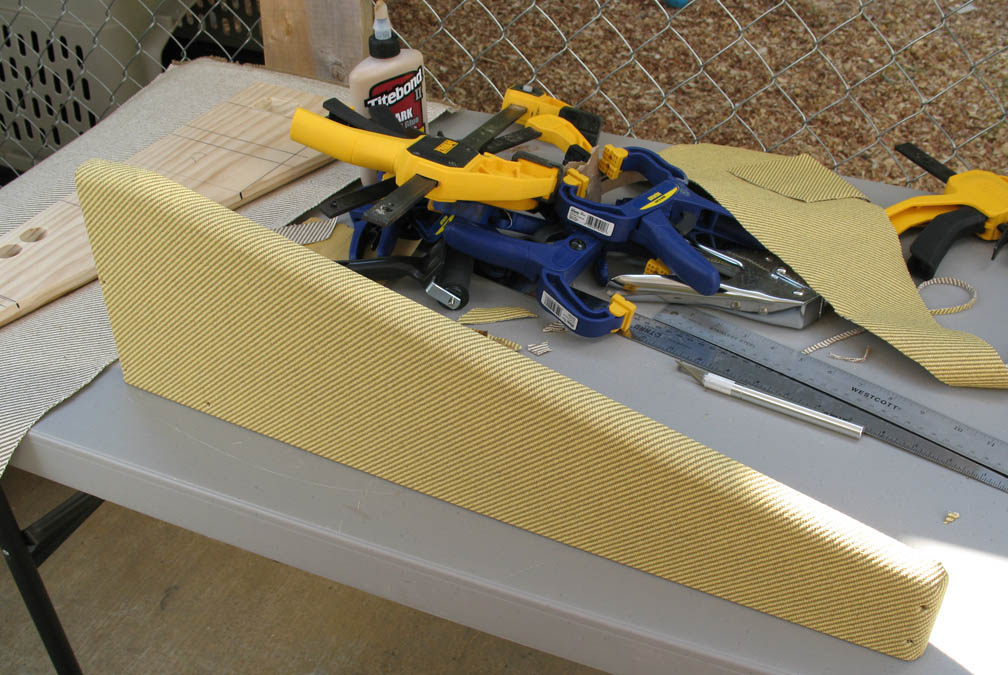
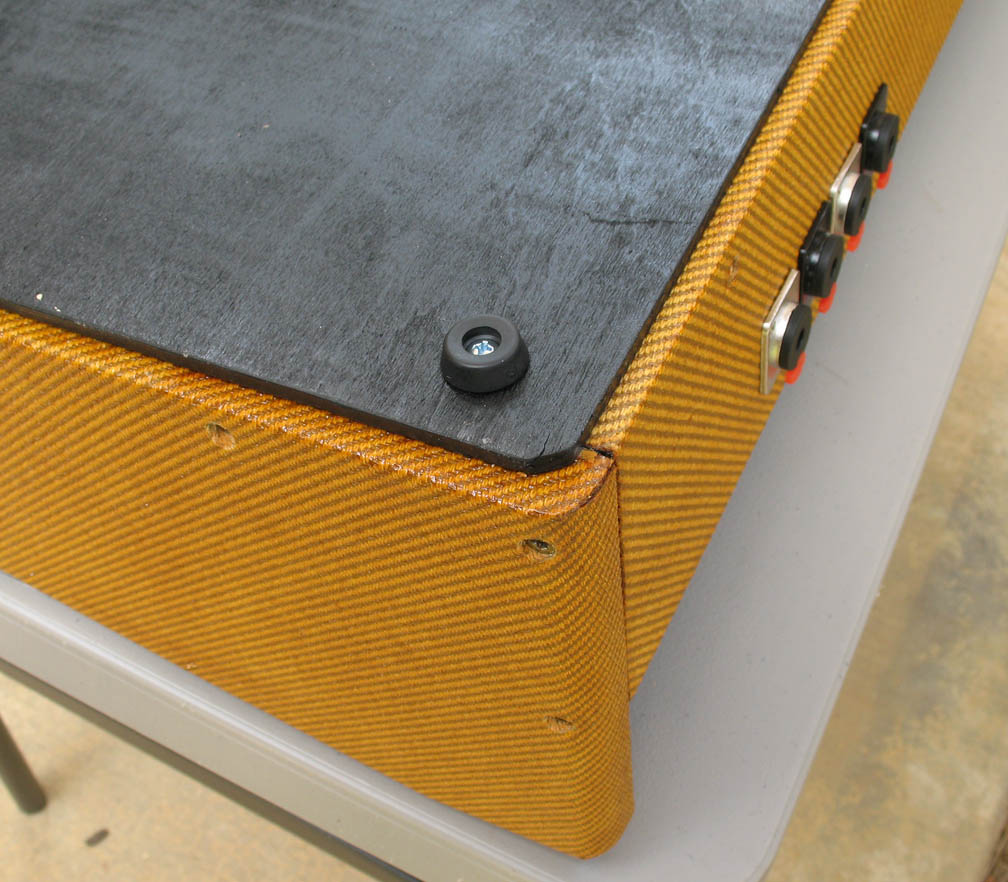
My first round corner wrap was a complete fail (shown above-middle). I did it the way I saw people do it online, but ended up with a large gap that had to be filled with a small piece of tweed. I came up with an easier, more accurate way to do it for the rest of the corners. First, Glue one side of the corner down, wrapping past the center of the corner (as shown in the photo below-left). After that side is glued and dried, pull the other side tight across the corner, overlapping the previous layer (shown below-middle) Do not glue that corner yet. Take a hobby knife, box cutter, or razor blade and cut through both layers, right on the center of the corner (shown red below). Remove the excess tweed from the side that was glued down, and you should get a nicely mated cut (shown below-right). Glue the other side down and press the corners together on either side of the cut.
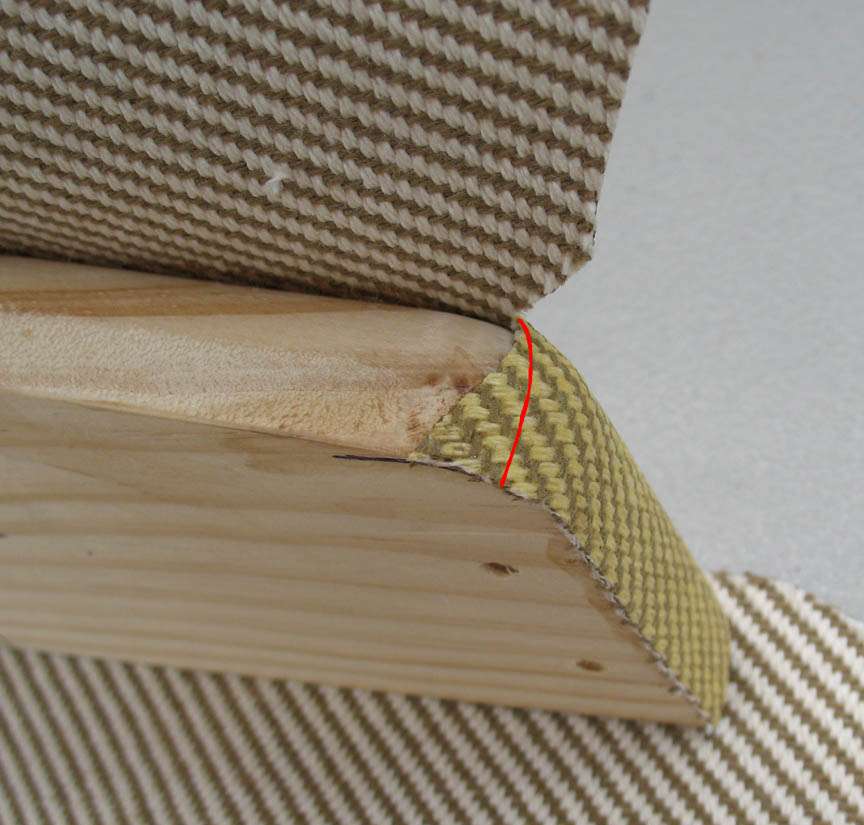
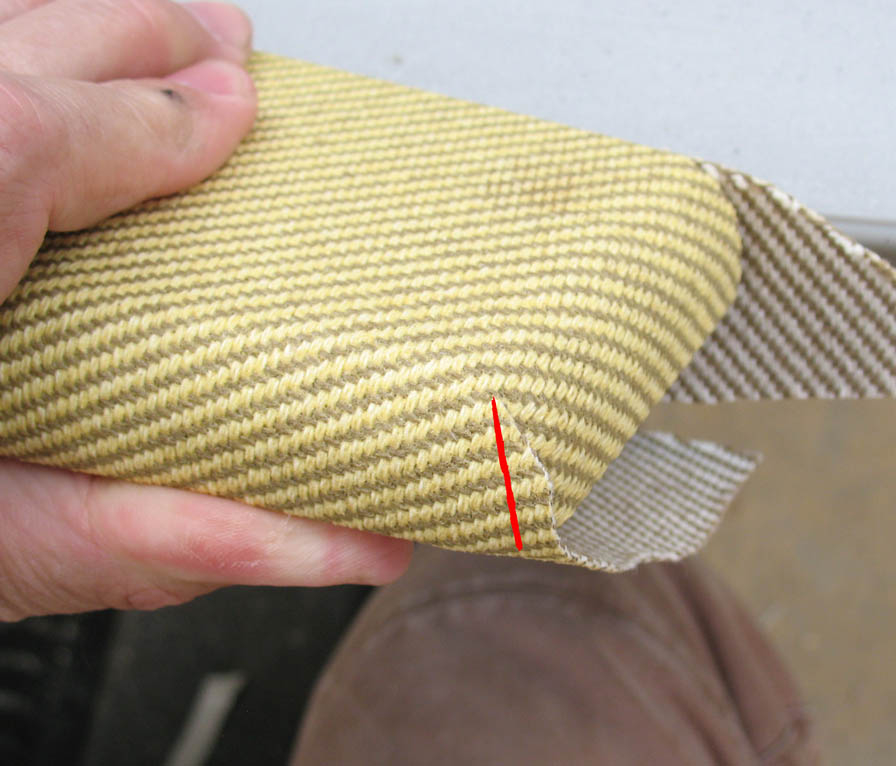
shown above - wrap one corner and glue down (left), pull the other corner tight and cut through both tweed layers on the red line (middle), then gue the other corner down.
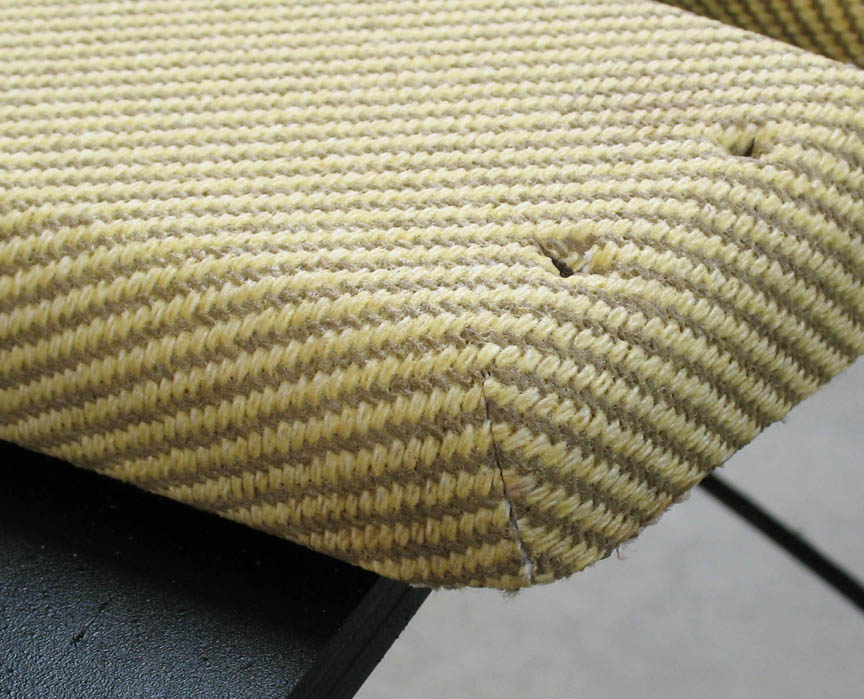
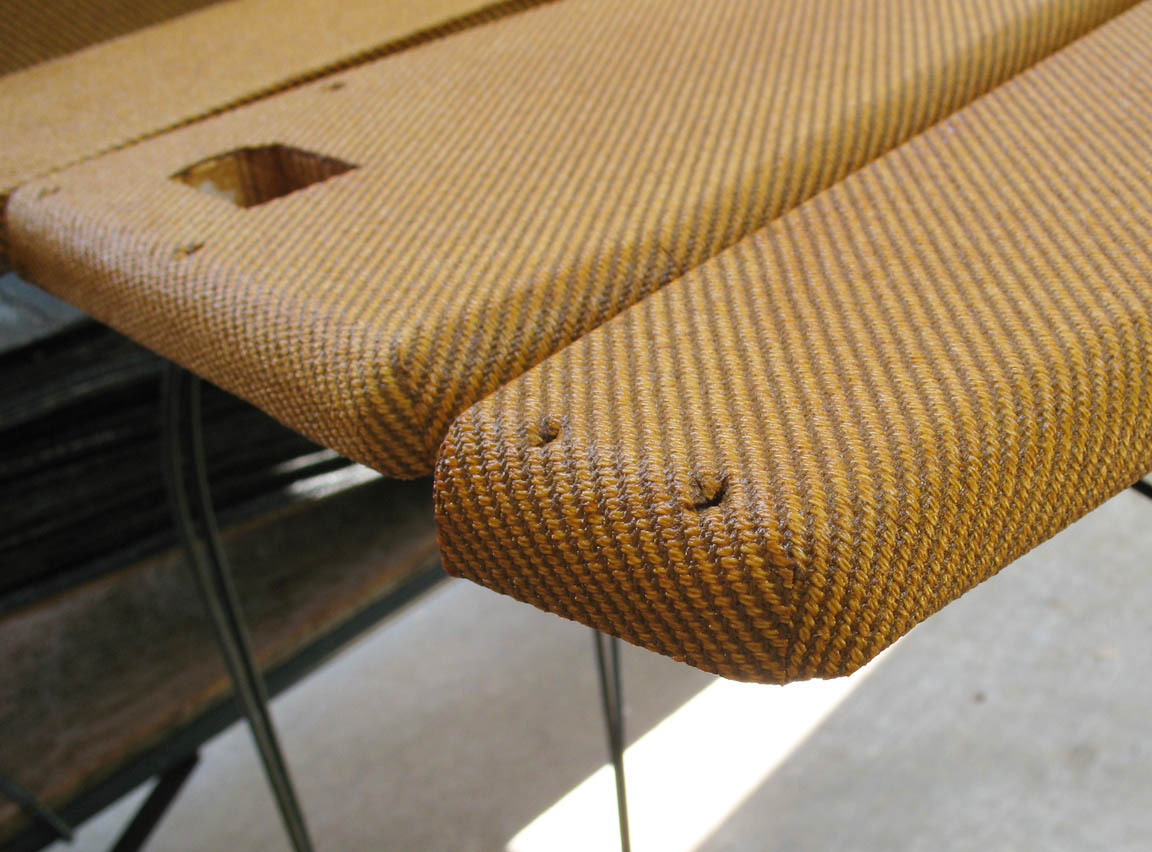
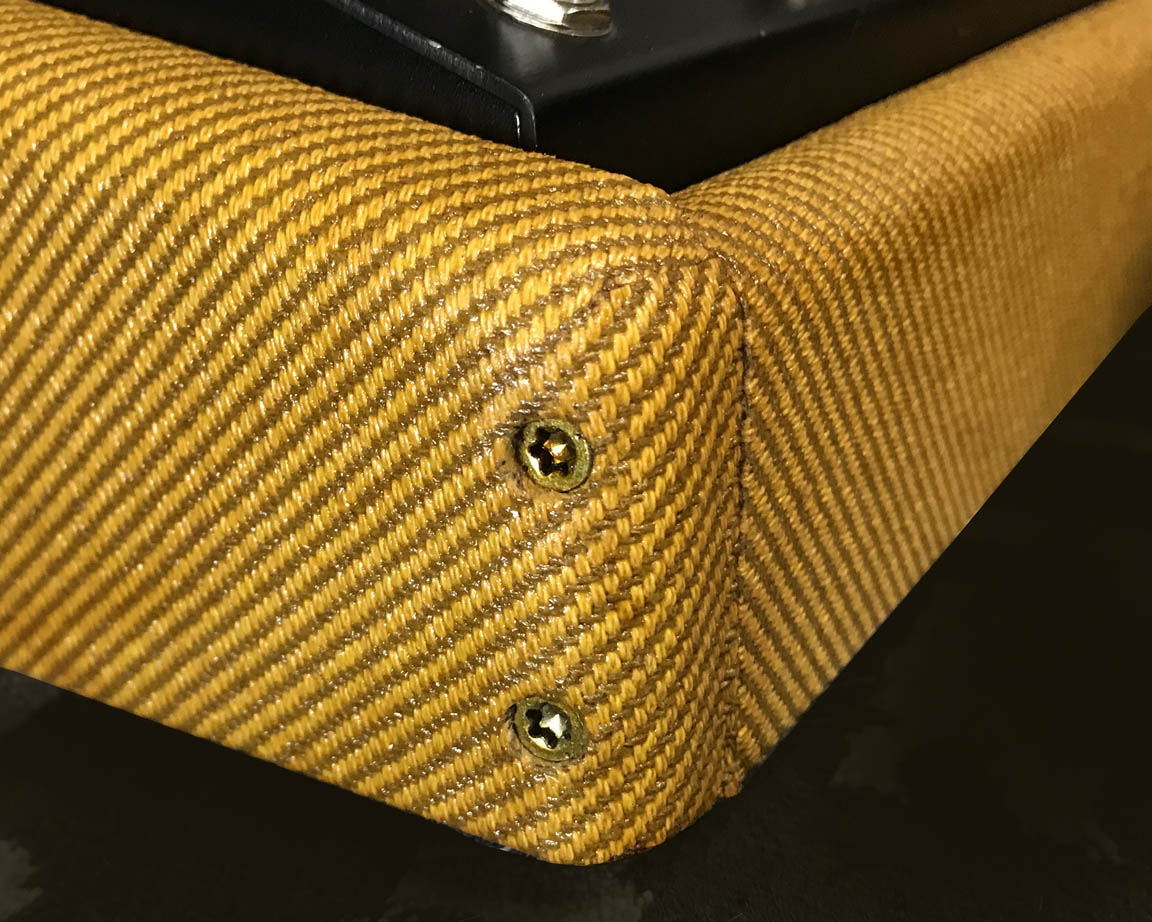
June 17th, 2018 - After gluing and pressing it tight to the previously glued side, you can get a clean seam with no gaps, like the photos below. With more pratice I could have probably gotten the seams to be nearly invisible.
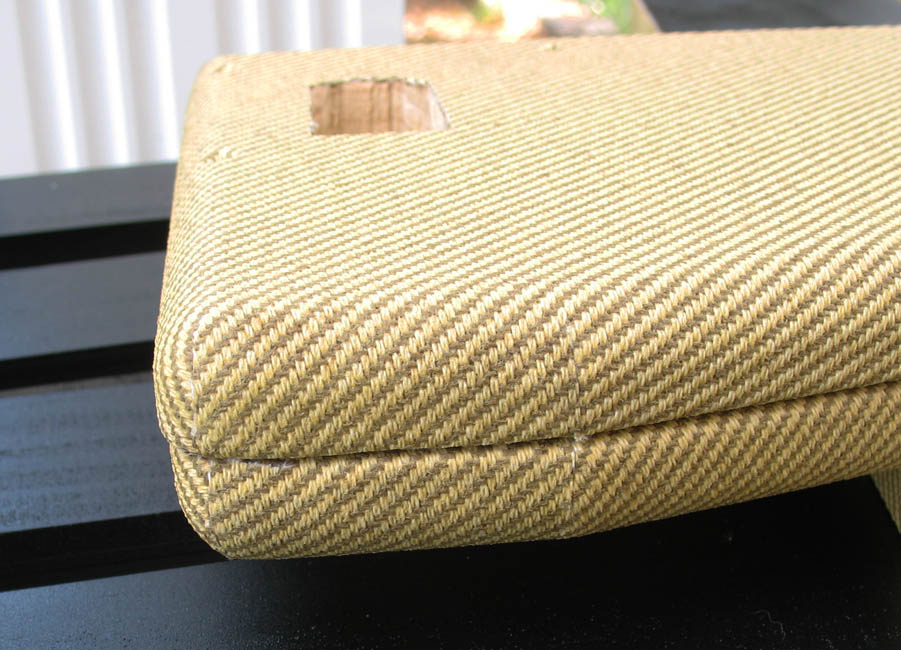

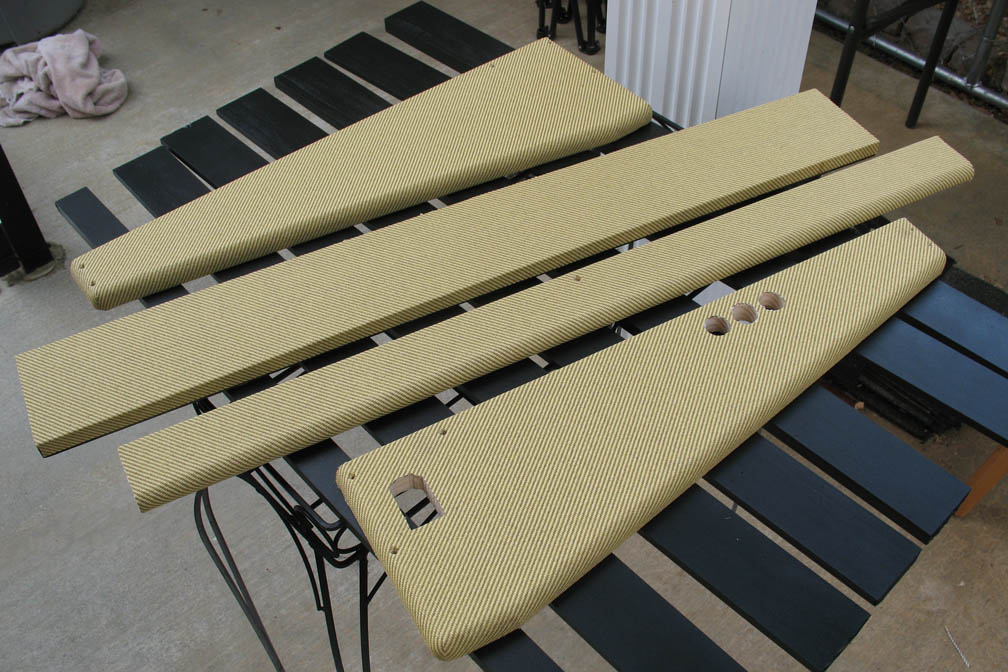
shown above - the finished tweed wrapped parts
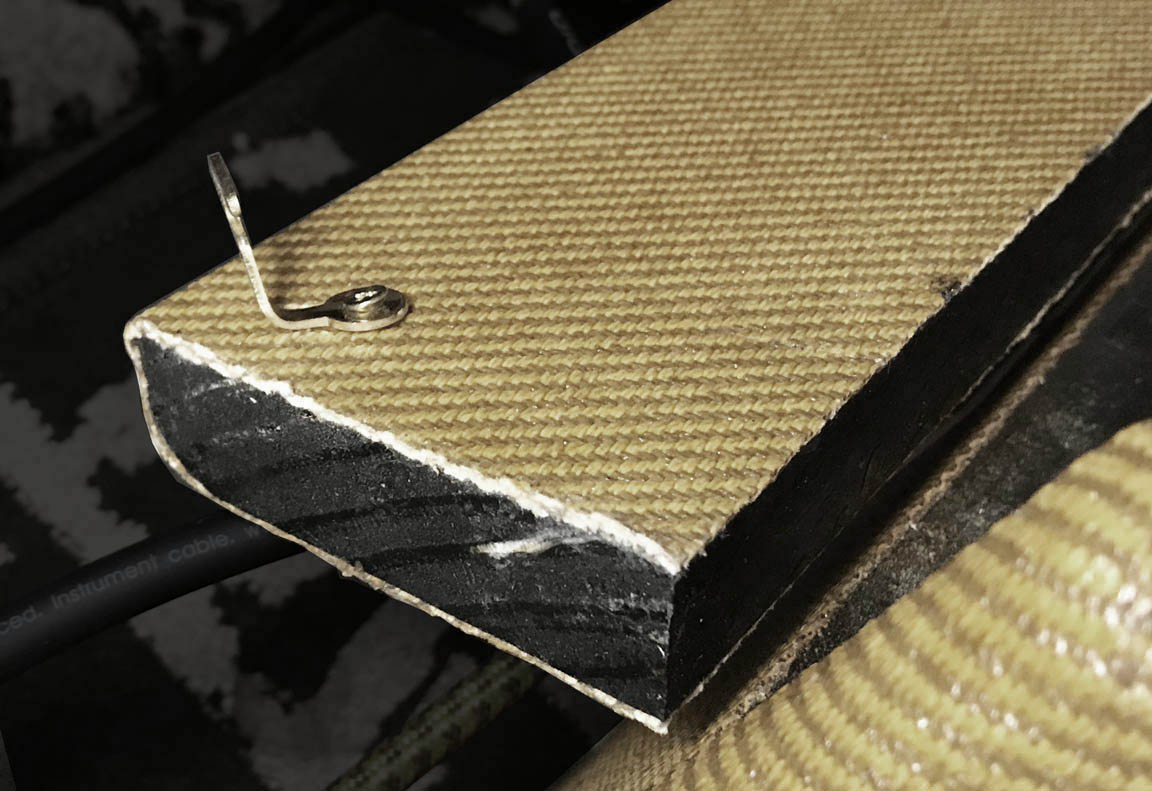
shown above - using a razor blade, I trimmed the excess cloth from the bottom board edges and the sides that will mate against the other boards
After all the cabinet parts were covered in tweed I let them dry overnight. I then took a razor blade and trimmed all the excess cloth from the bottom facing edges of the parts before coating them with sealant. I love the aged amber look of vintage Fender tweed covered amps, so I wanted that look for the tweed. In the 1950s Fender coated the raw tweed with clear shellac and let it harden. They then sanded it smooth and sprayed it with with nitrocellulose lacquer to add an additional sealant. Over time the nitro turned various shades of amber, brown, and yellow. These days people just used tinted laquer or amber shellac to achieve the same aged tweed look.
June 18th, 2018 - I debated on just using lacquer or shellac. Lacquer wil last longer and is more durable, but is volatile, requires ventilation because of the fumes, and requires more than a few coats. Shellac is natural product made from lac insect secretions (it even has a food grade edible form) that can be brushed on thick and is easy to clean up with denatured alcohol. I have used lacquer several times before, but never shellac. I heard it was easy to use so I went the shellac route and bought a 1 quart can of Zinsser Bulls Eye amber colored shellac, which seemed to be the go-to brand used by cabinet makers. It cost around $14.
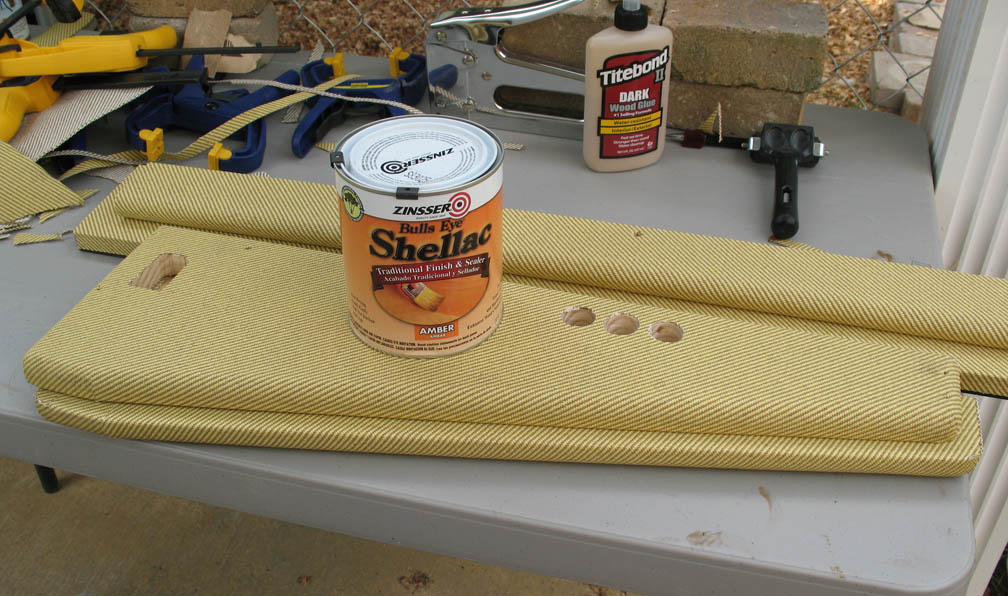
shown above - amber shellac coating, before and after
shown above - after two coats of amber shellac were applied to the tweed covering and lightly sanding with 400 grit sandpaper
I evenly brushed on a coat of shellac with a cheap paint brush and found it very easy to work with. It was mosly dry to the touch in under an hour. The trick is to do smooth, even strokes from one end to the other without stopping. It's best not to go back over an area after it has started to dry or you risk making a darker patch - which I did on one inside wall, but that will be hidden after the board is assembled. After drying I lightly sanded the surface with some 400 grit sandpaper to smooth it out. I thought it needed to be a bit darker so I gave it another even coat of laquer and hit the exact look I was going for. After some light sanding it was done and I really love the look. It matches my '59 Fender Bassman cabinet. Interesting stuff, this bug vomit.
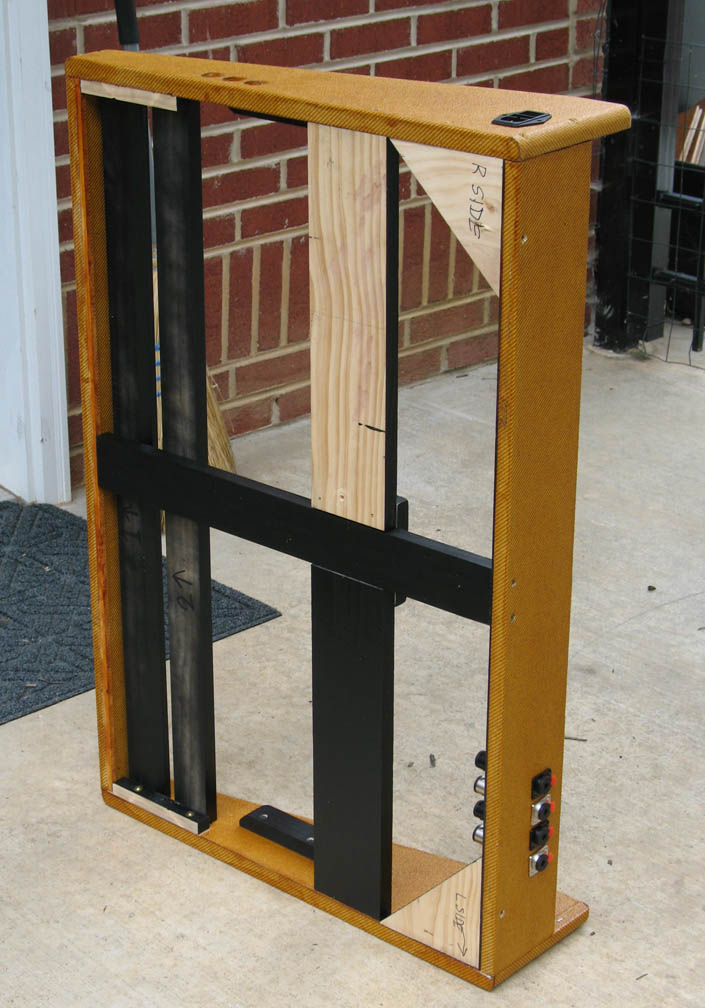
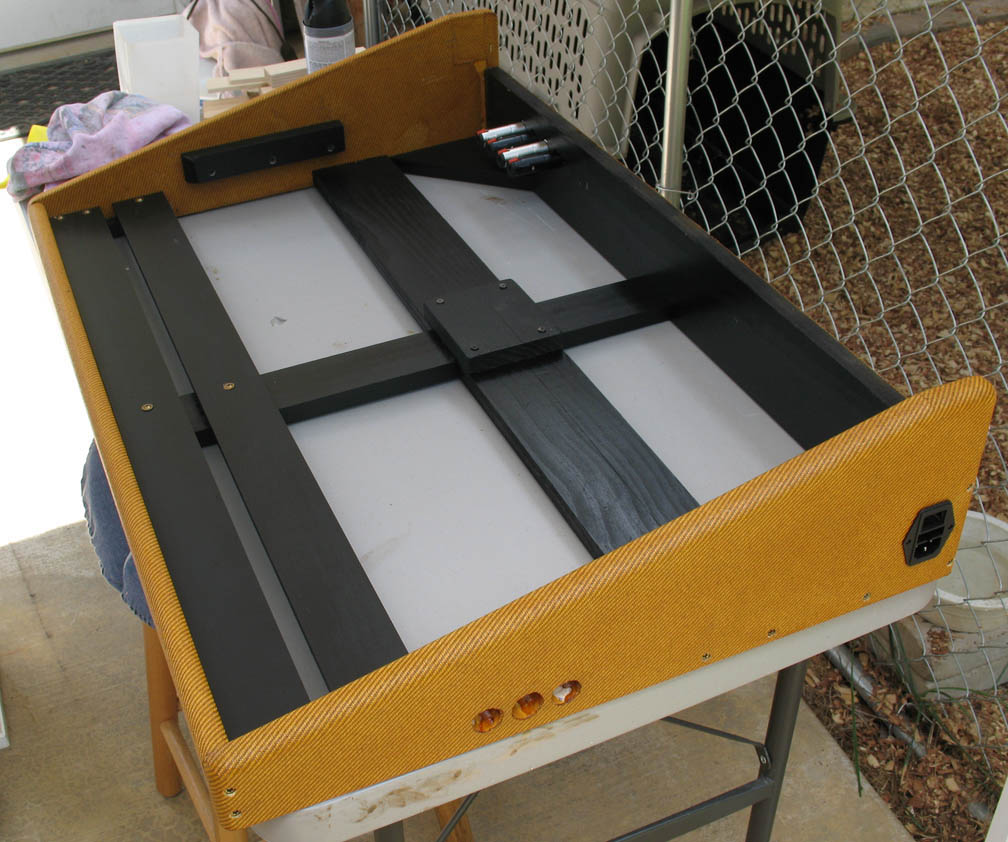
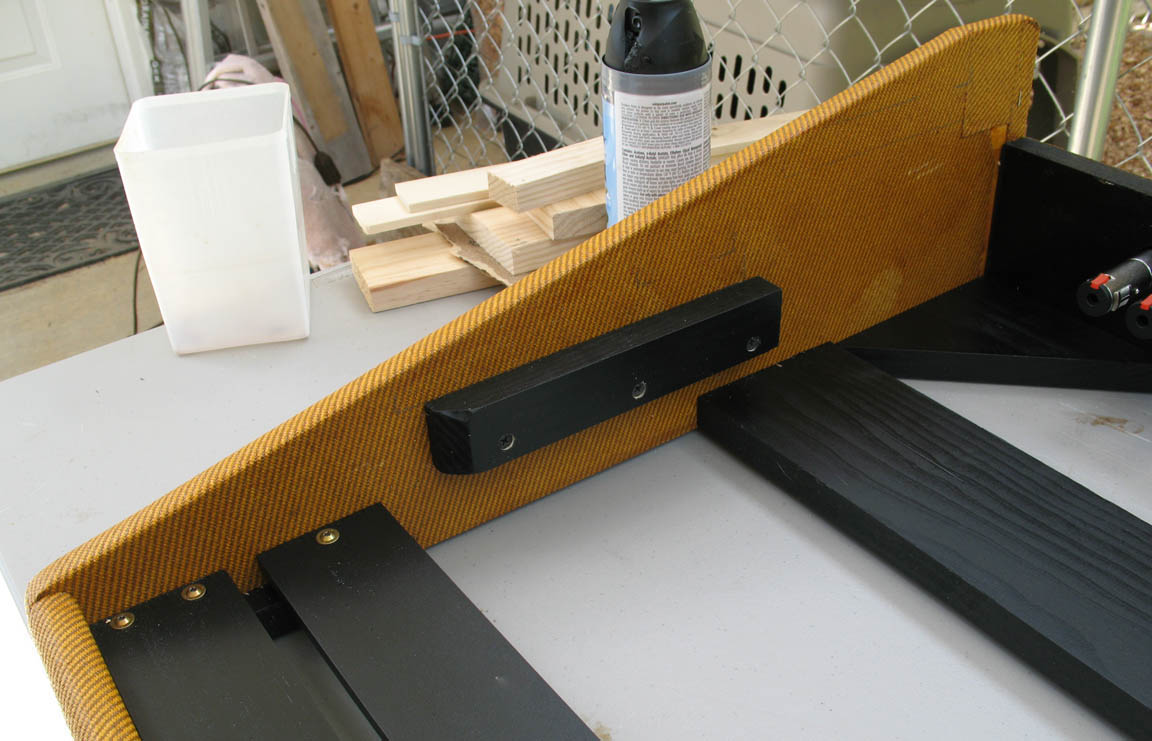
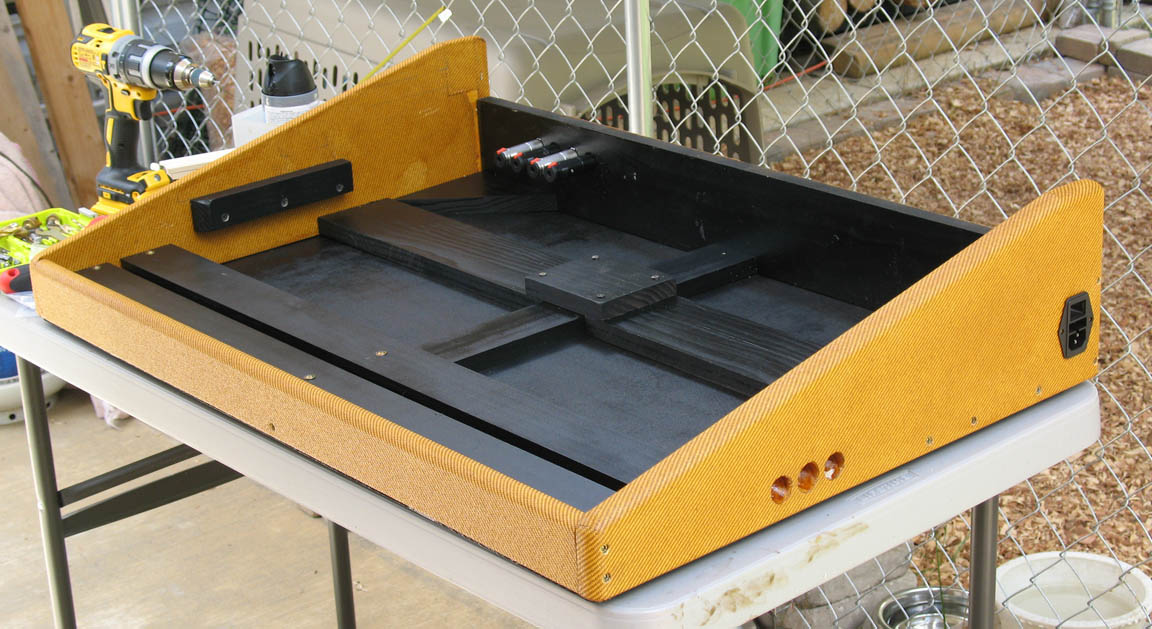
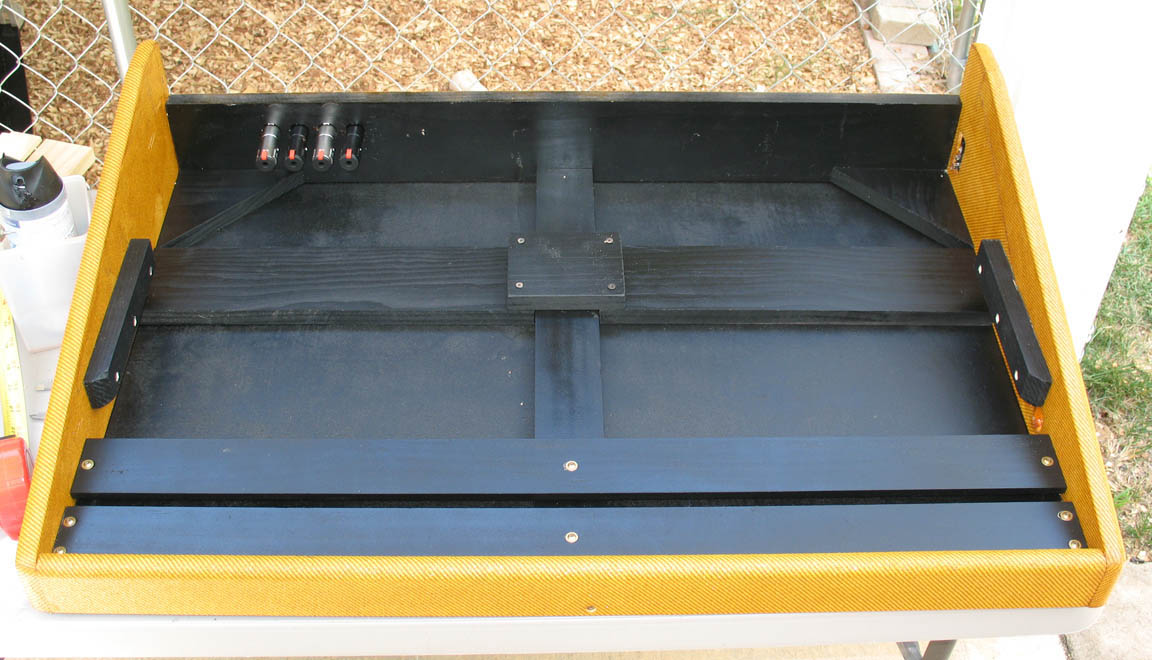
shown above - assembled cabinet with support boards added to hold the Voodoo Labs power supplies.
June 19th, 2018 - After letting the shellac dry overnight I began assembling the cabinet together and adding the support corners, center brace, and front shelves using brass torx wood screws. I was about to nail and screw down the 1/8" wood bottom cover in place when I realized I had forgotten to cut the 3/4" support boards to bolt the two Voodoo Labs power supplies to. I added those and secured them in the center with a wood block.

shown above - Brass torx screws hold the cabinet together. After tacking the wood bottom cover in place I aded the rubber rubber feet with short wood screws
I then tacked the bottom cover on with some thin, tiny finishing nails and screwed it permanently in place using 6 rubber feet and wood screws. They screw into the cabinet frame corners and the center brace. I pre-drilled all the holes to avoid any wood splitting issues. I found the rubber cabinet feet on Amazon.com. Two packs of 4 cost about $5.50.